Parts Bin Special: Upgrading to Stronger Factory Brakes
Ideally the tuning process is a cyclical affair. You start out with basic power mods, move onto basic suspension bits, a change of brake pads and fluids, and progressively move up in a circular fashion and repeat the sequence in some way or another. As we further our builds this process becomes more and more complicated as we try to get more out of our vehicles. Basic bolt-ons lead to full engine rebuilds, lowering springs become coilovers and bushings, and those aggressive brake pads eventually won’t be enough to stop your now-more-powerful car.
We know the next step to improving the brakes once the stock system (literally) can’t handle the heat – bigger is better. Your stock system is ultimately built to a certain limit, these are only capable of handling all that your car has to throw at it while its power was still stock; We’re a bit past that now aren’t we? That said, the options for upgrading your brakes scales with how much you’re willing to throw at it; After all if we all had deep pockets a tried and true Big Brake Kit is a definite no-brainer. Reality isn’t as ideal though, so sometimes we’re led to go for something more, shall we say… budget friendly.
That ‘budget friendly’ bit is where it gets tricky, because when we consider looking at second-hand brakes or cheaper unknown/untested products, the risks of used items exponentially grows considering these are the damn things that stop your car. The Brake system needs to work as such: as a system. There are plenty of variables in this system that we must consider should we reach the point of needing to upgrade. We have here a proper example of how this should be performed: An SH9 Subaru Forester XT upgrading to GRB STI Brakes.
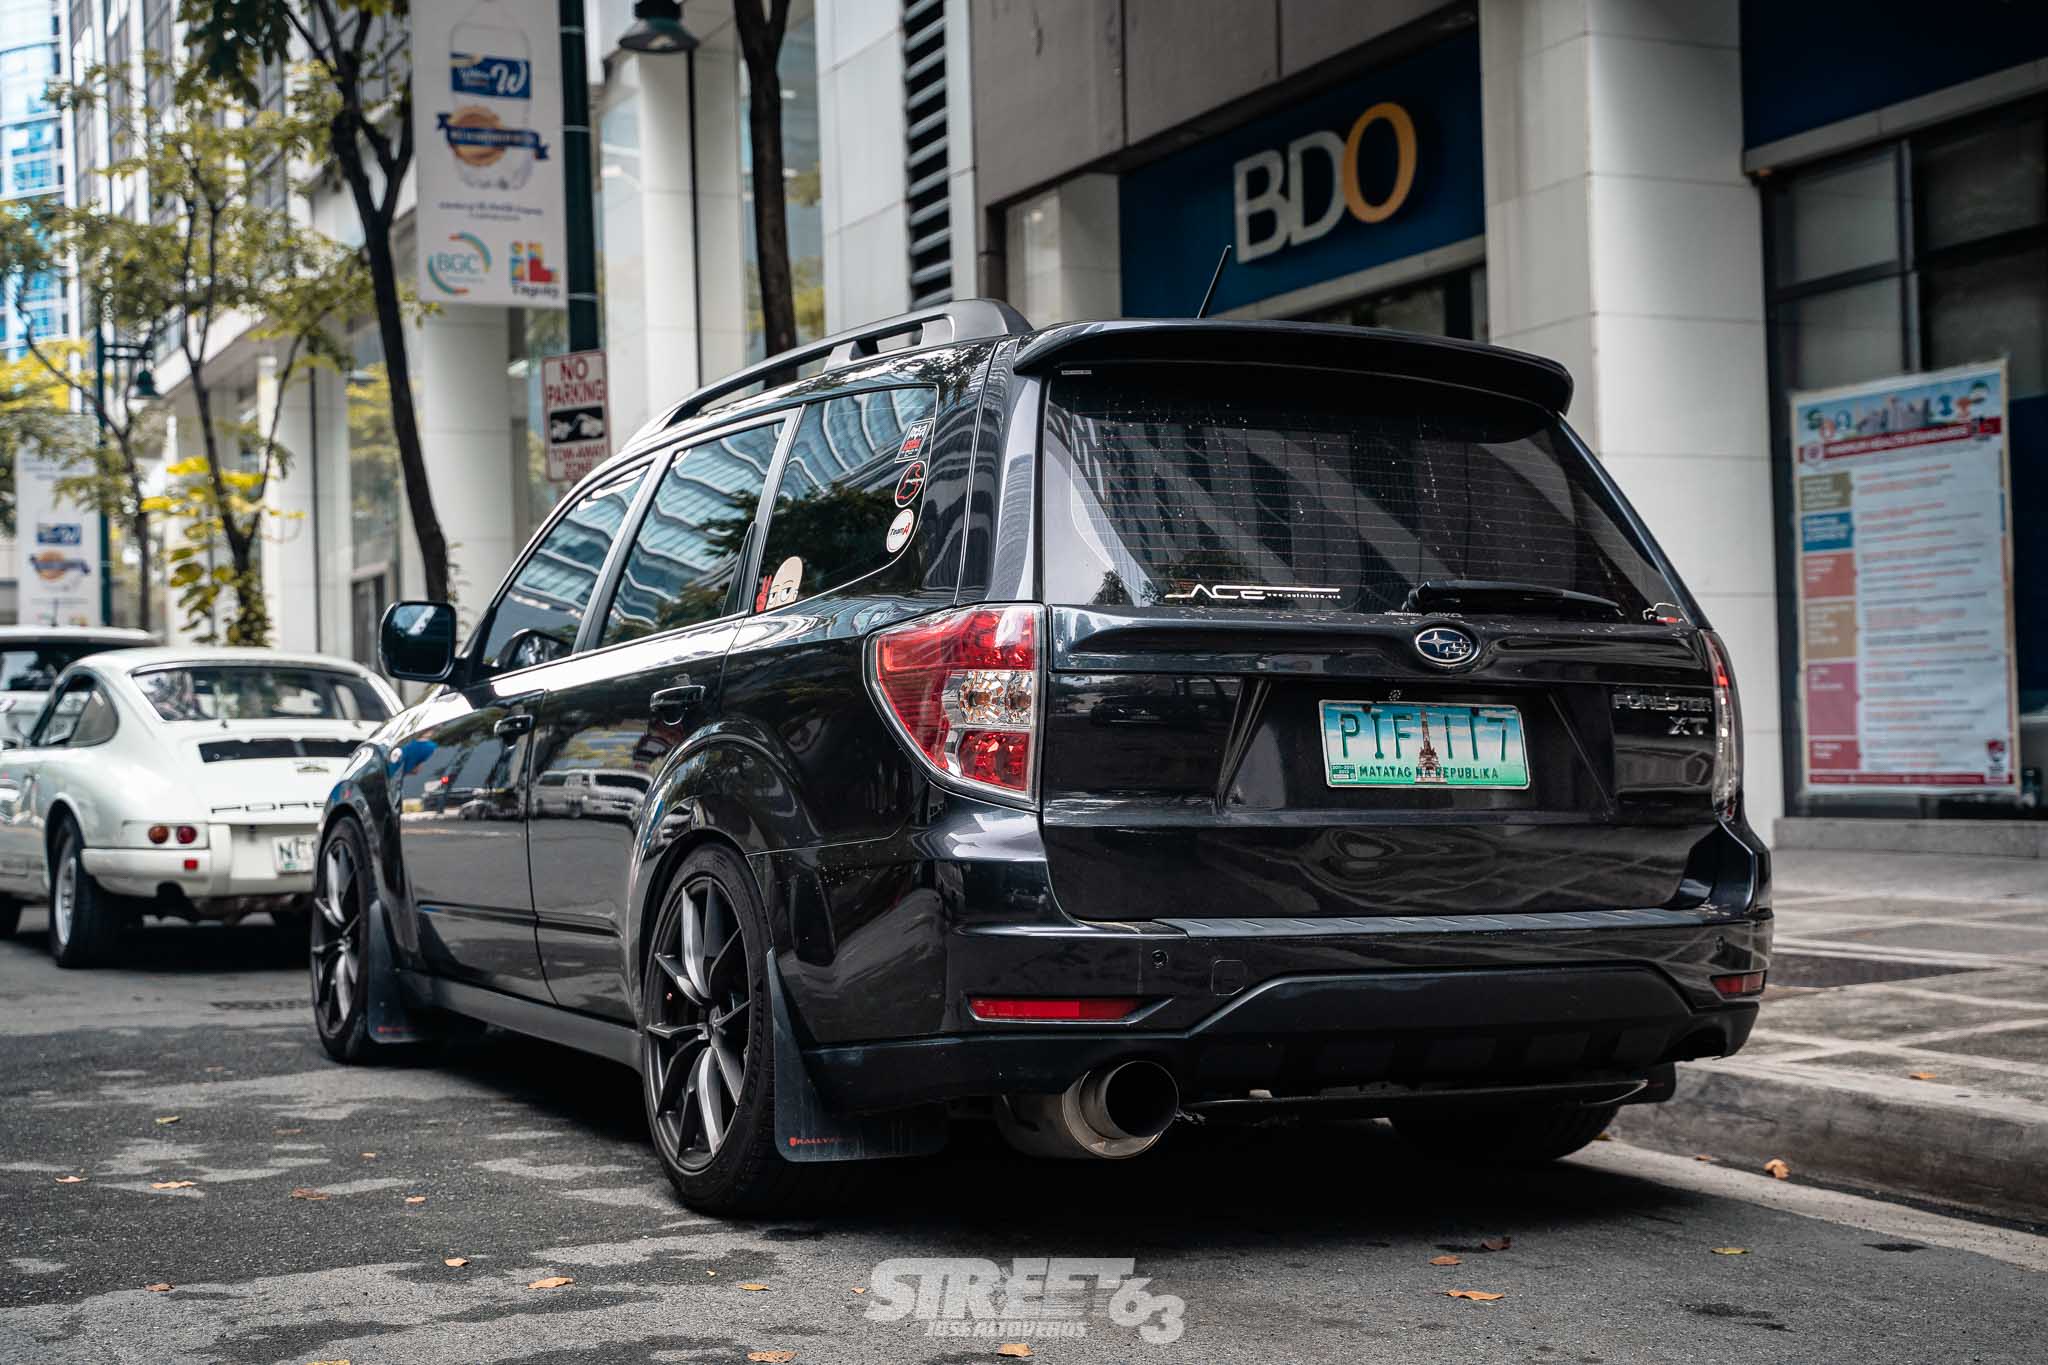
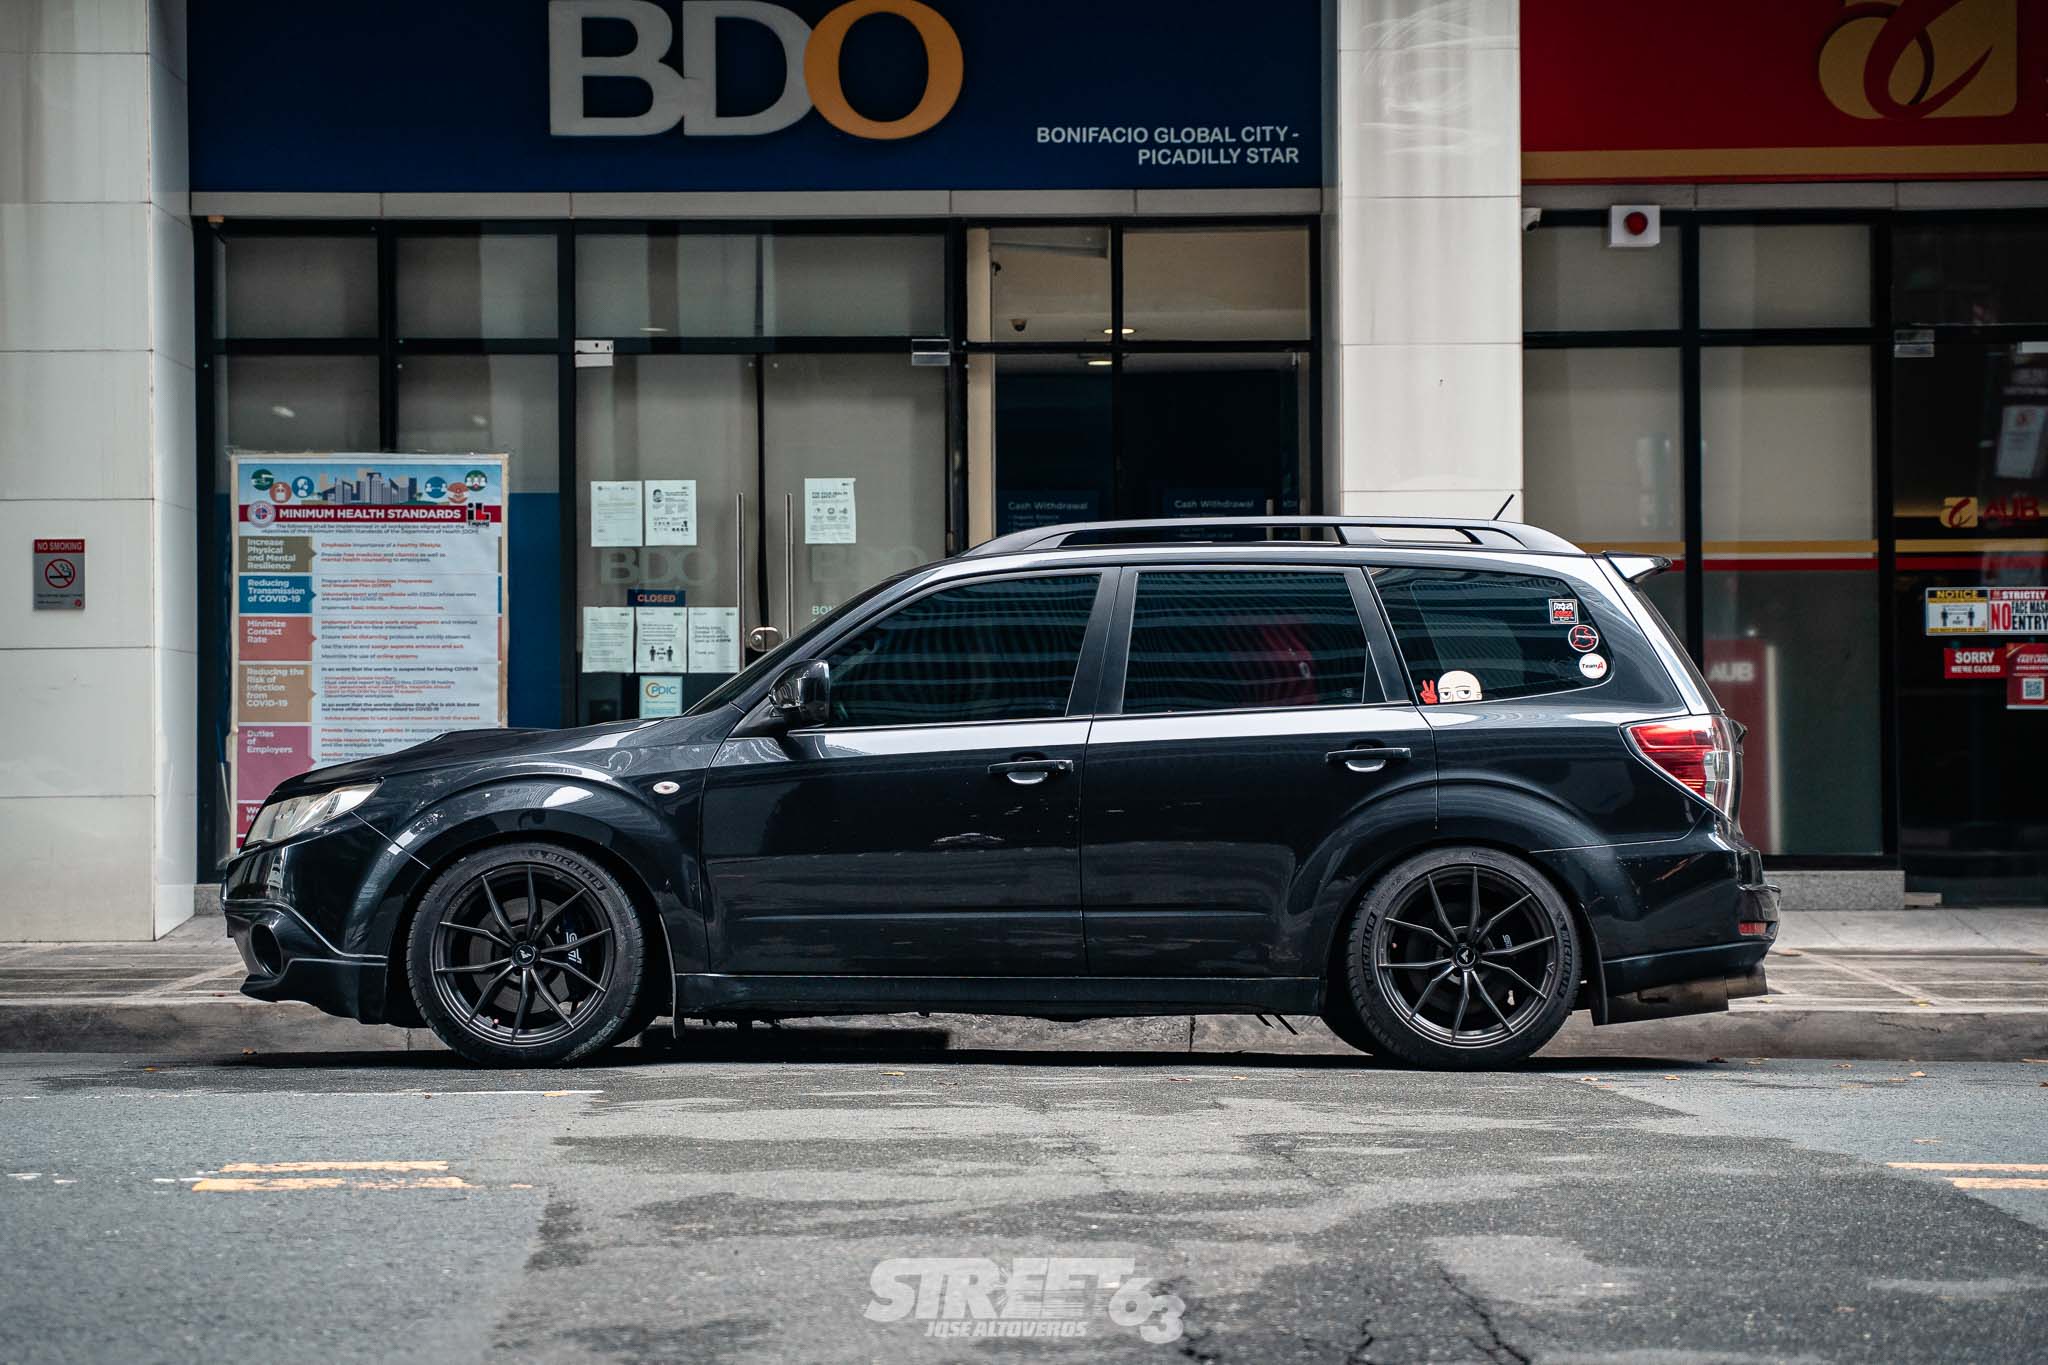
This FXT in question actually belongs to a good friend of mine. Having been in his care for close to 10 years, the crossover has seen a slow and steady conversion from its stock form to this wagon-like stance thanks to WRX struts and proper meaty fitment that fill the gaping stock wheel wells. With this substantial drop the EJ255’s power has inversely been upped to around 280whp by way of choice parts including an IHI VF52 turbine and a Process West Verticooler, all managed with an ECUTEK tune. All these parts lead towards a more performance-oriented take on the ‘family crossover’; And while the stock sliding calipers have gone through several sets of aggressive pads and rotors over the years, it’s high time the braking system got a proper overhaul to match its newfound performance potential.
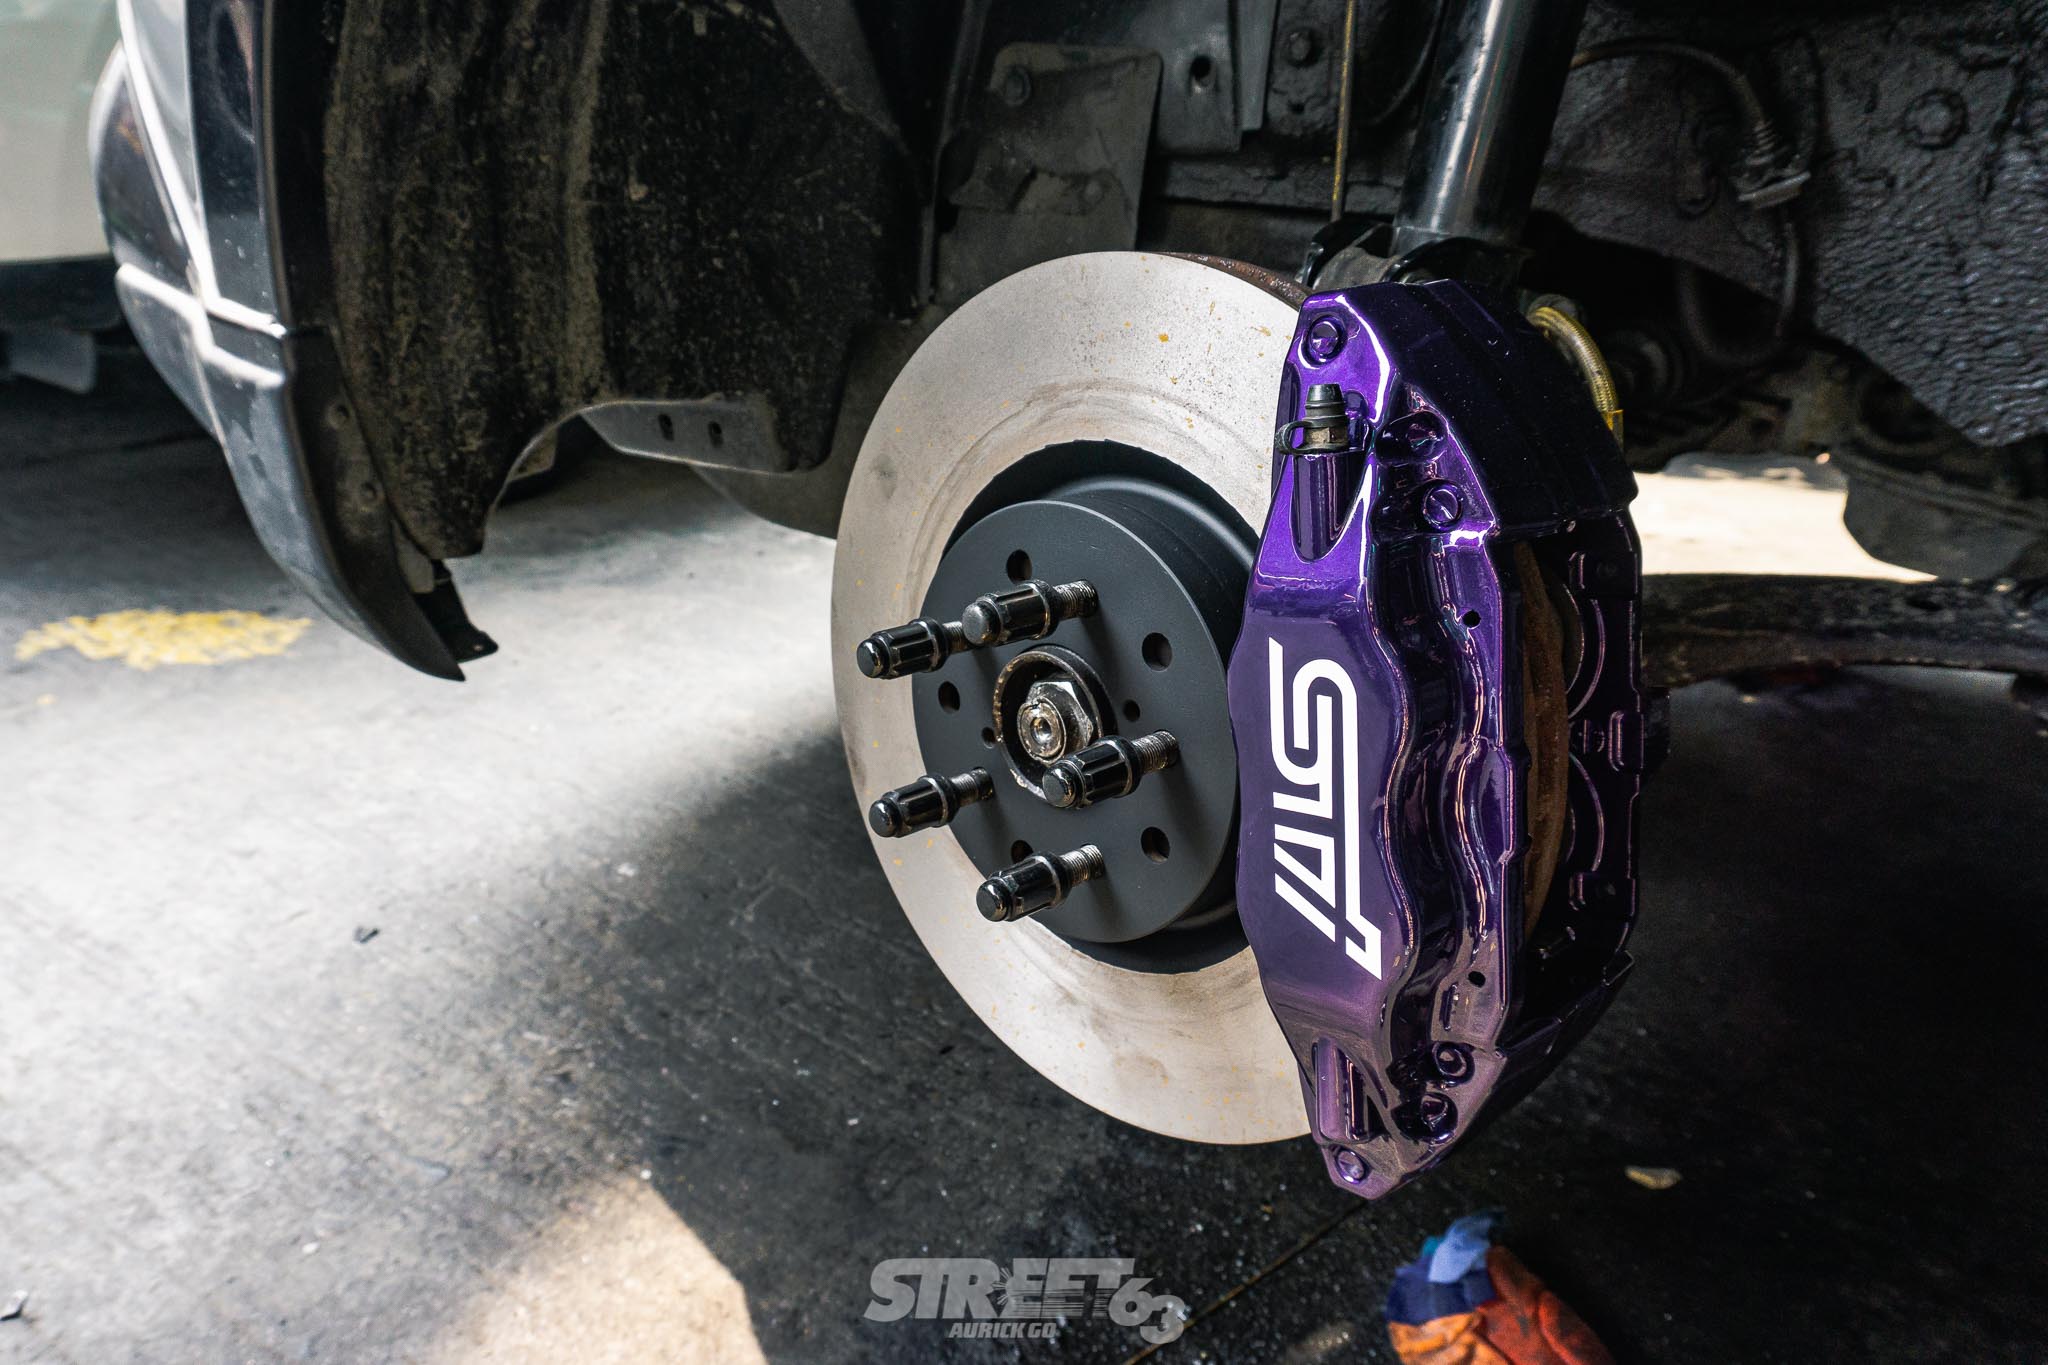
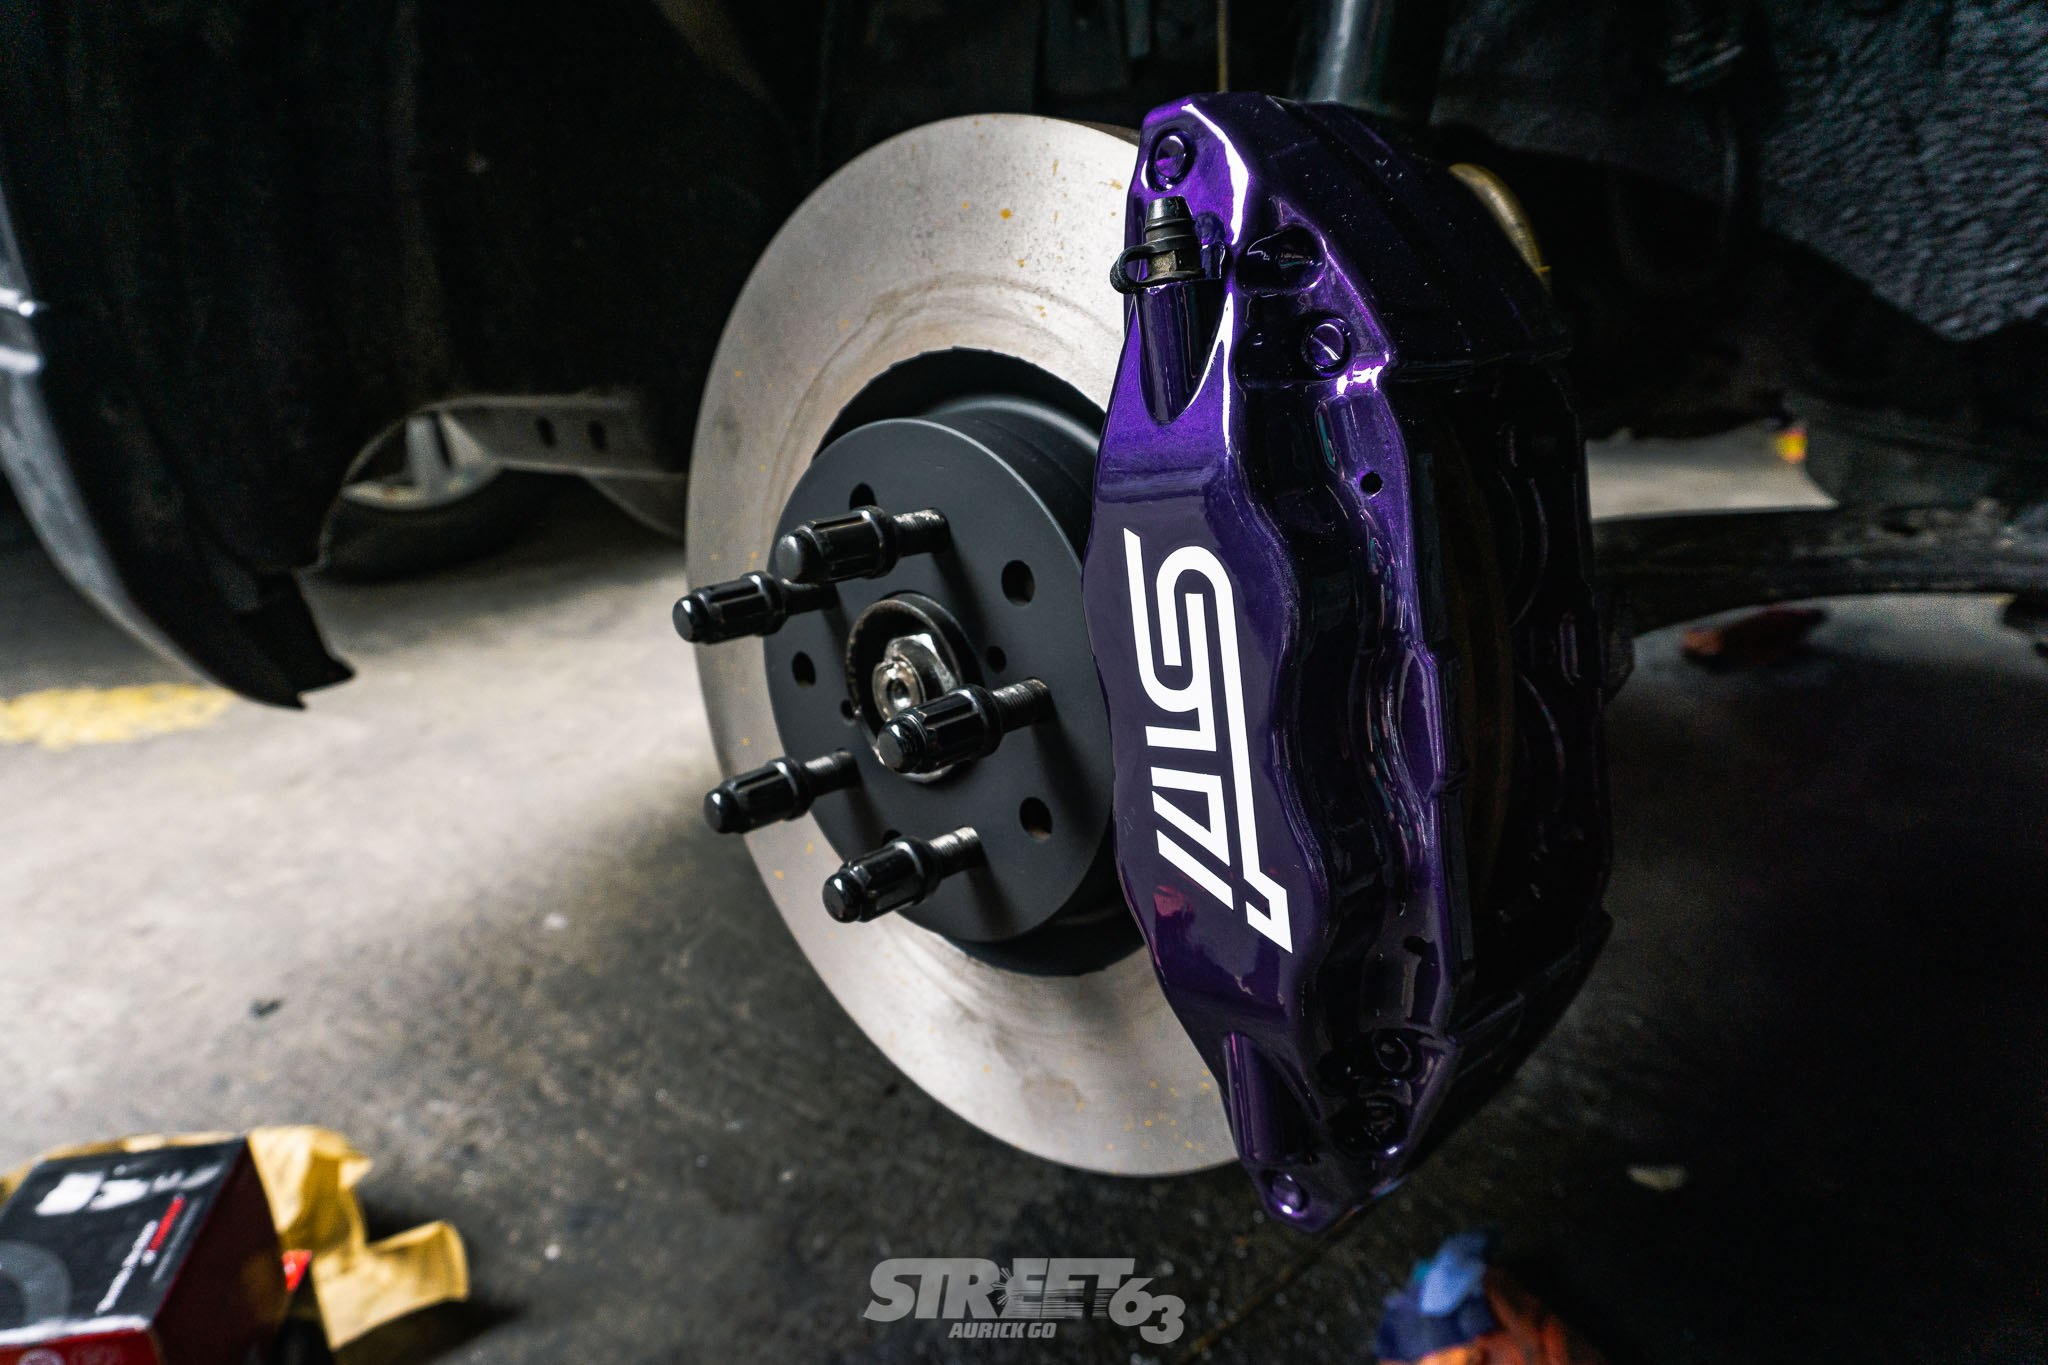
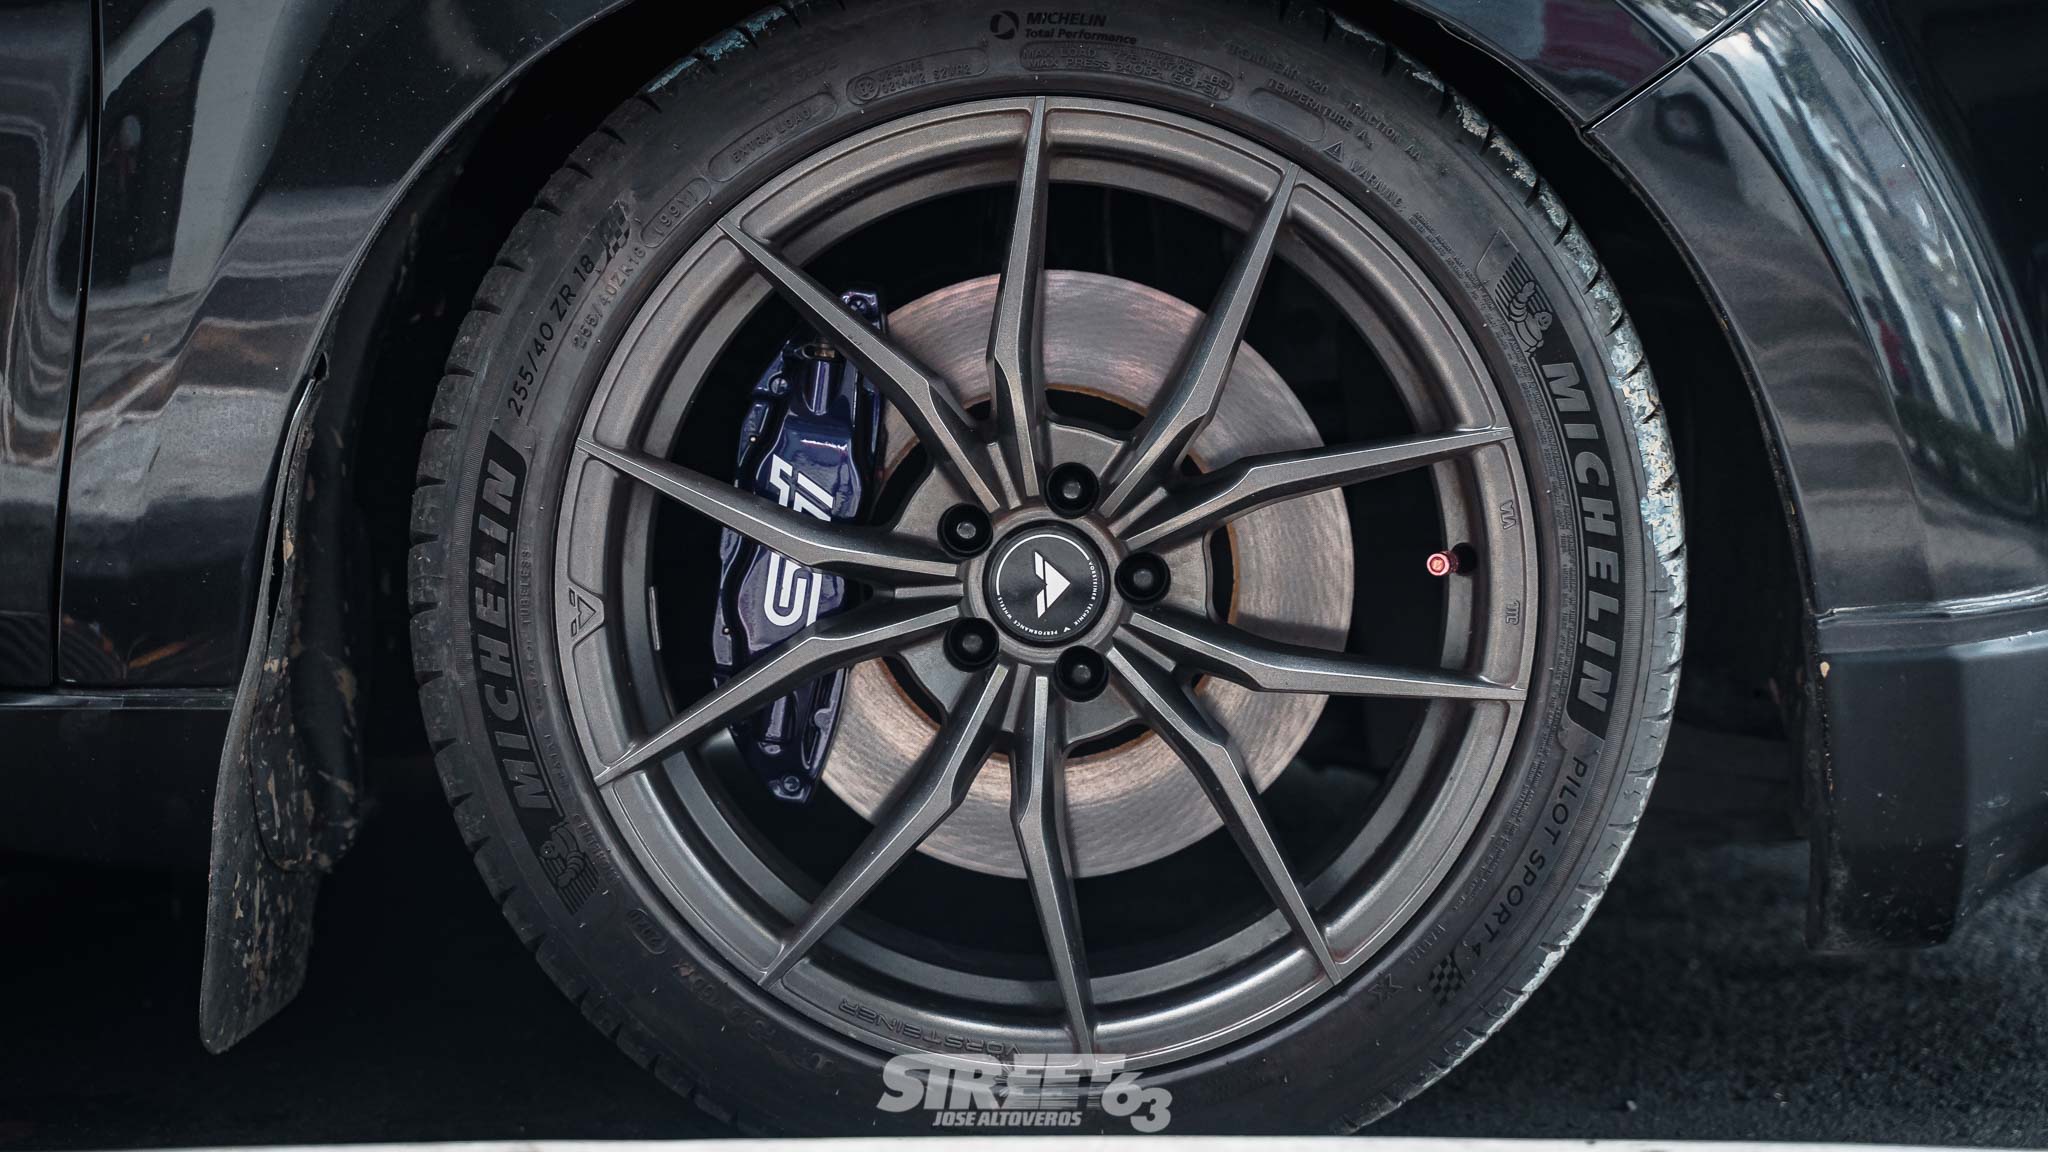
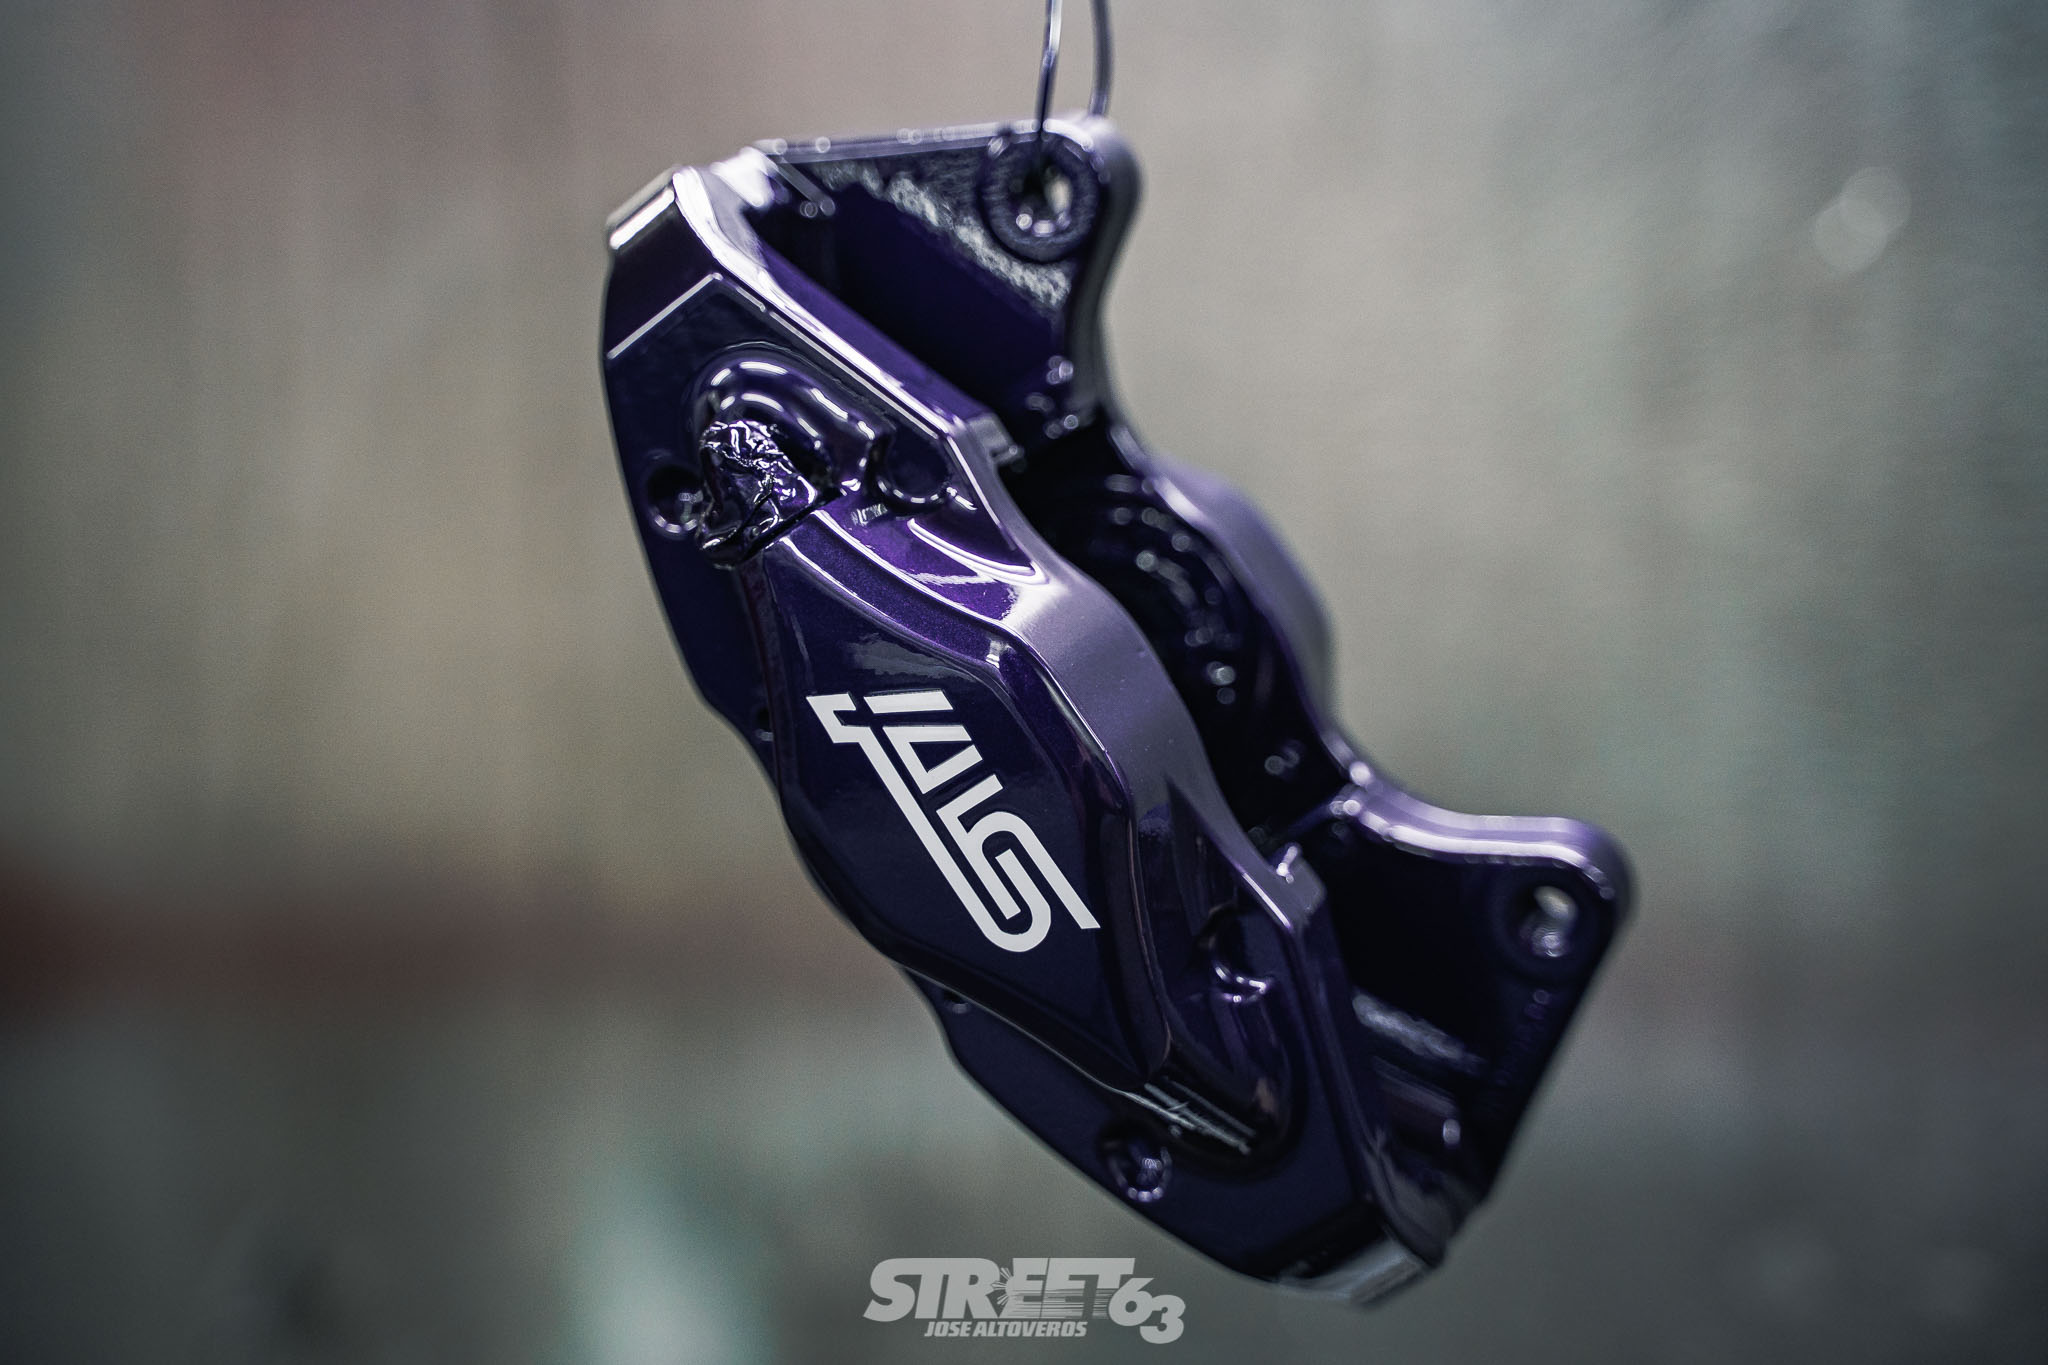
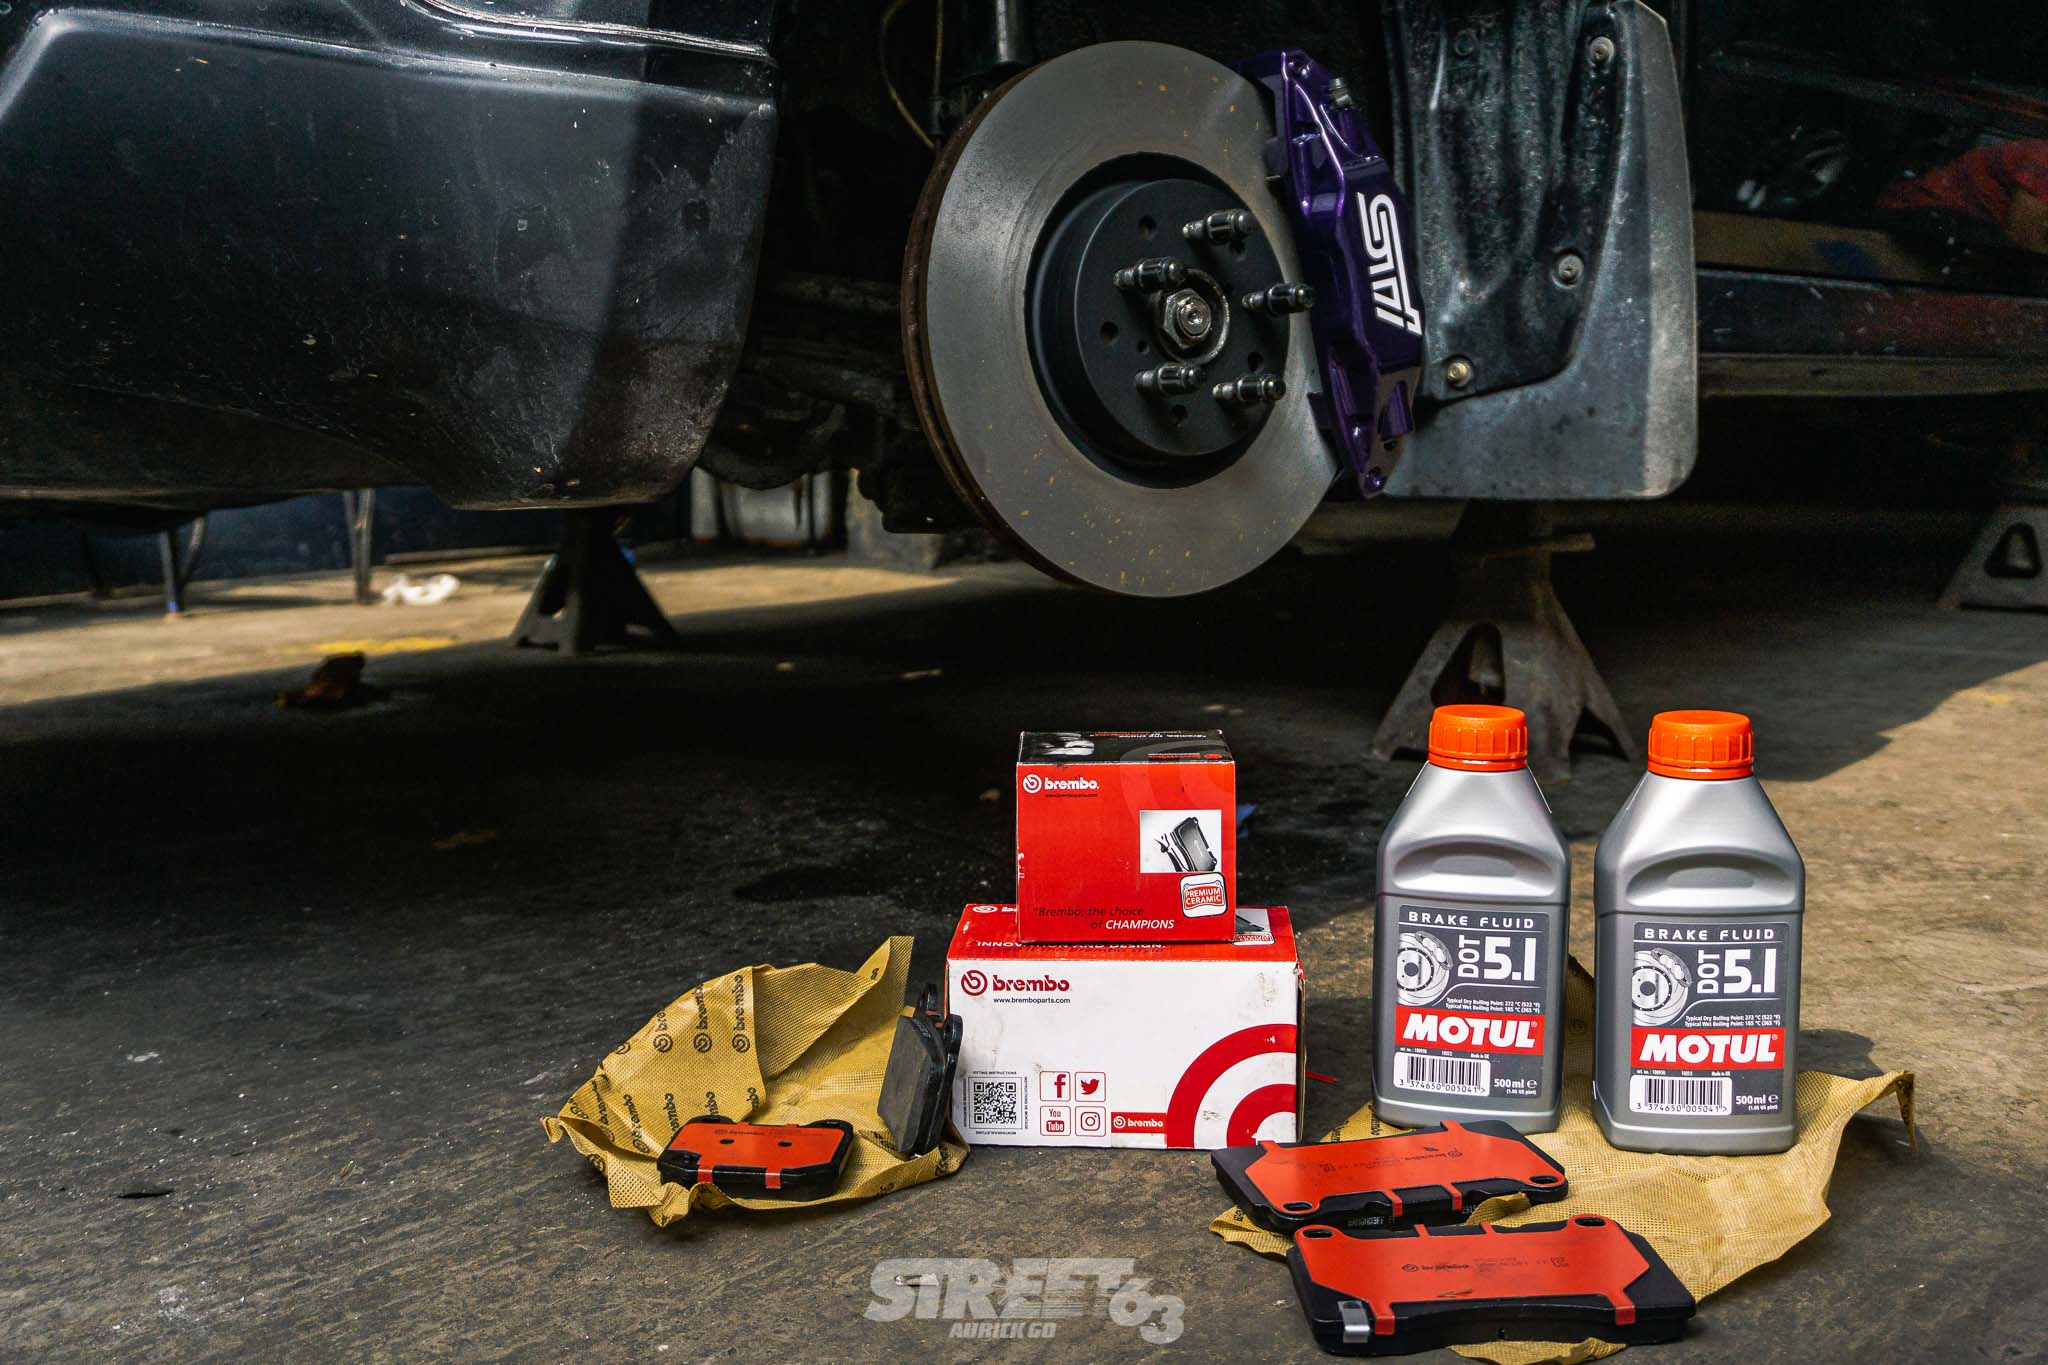
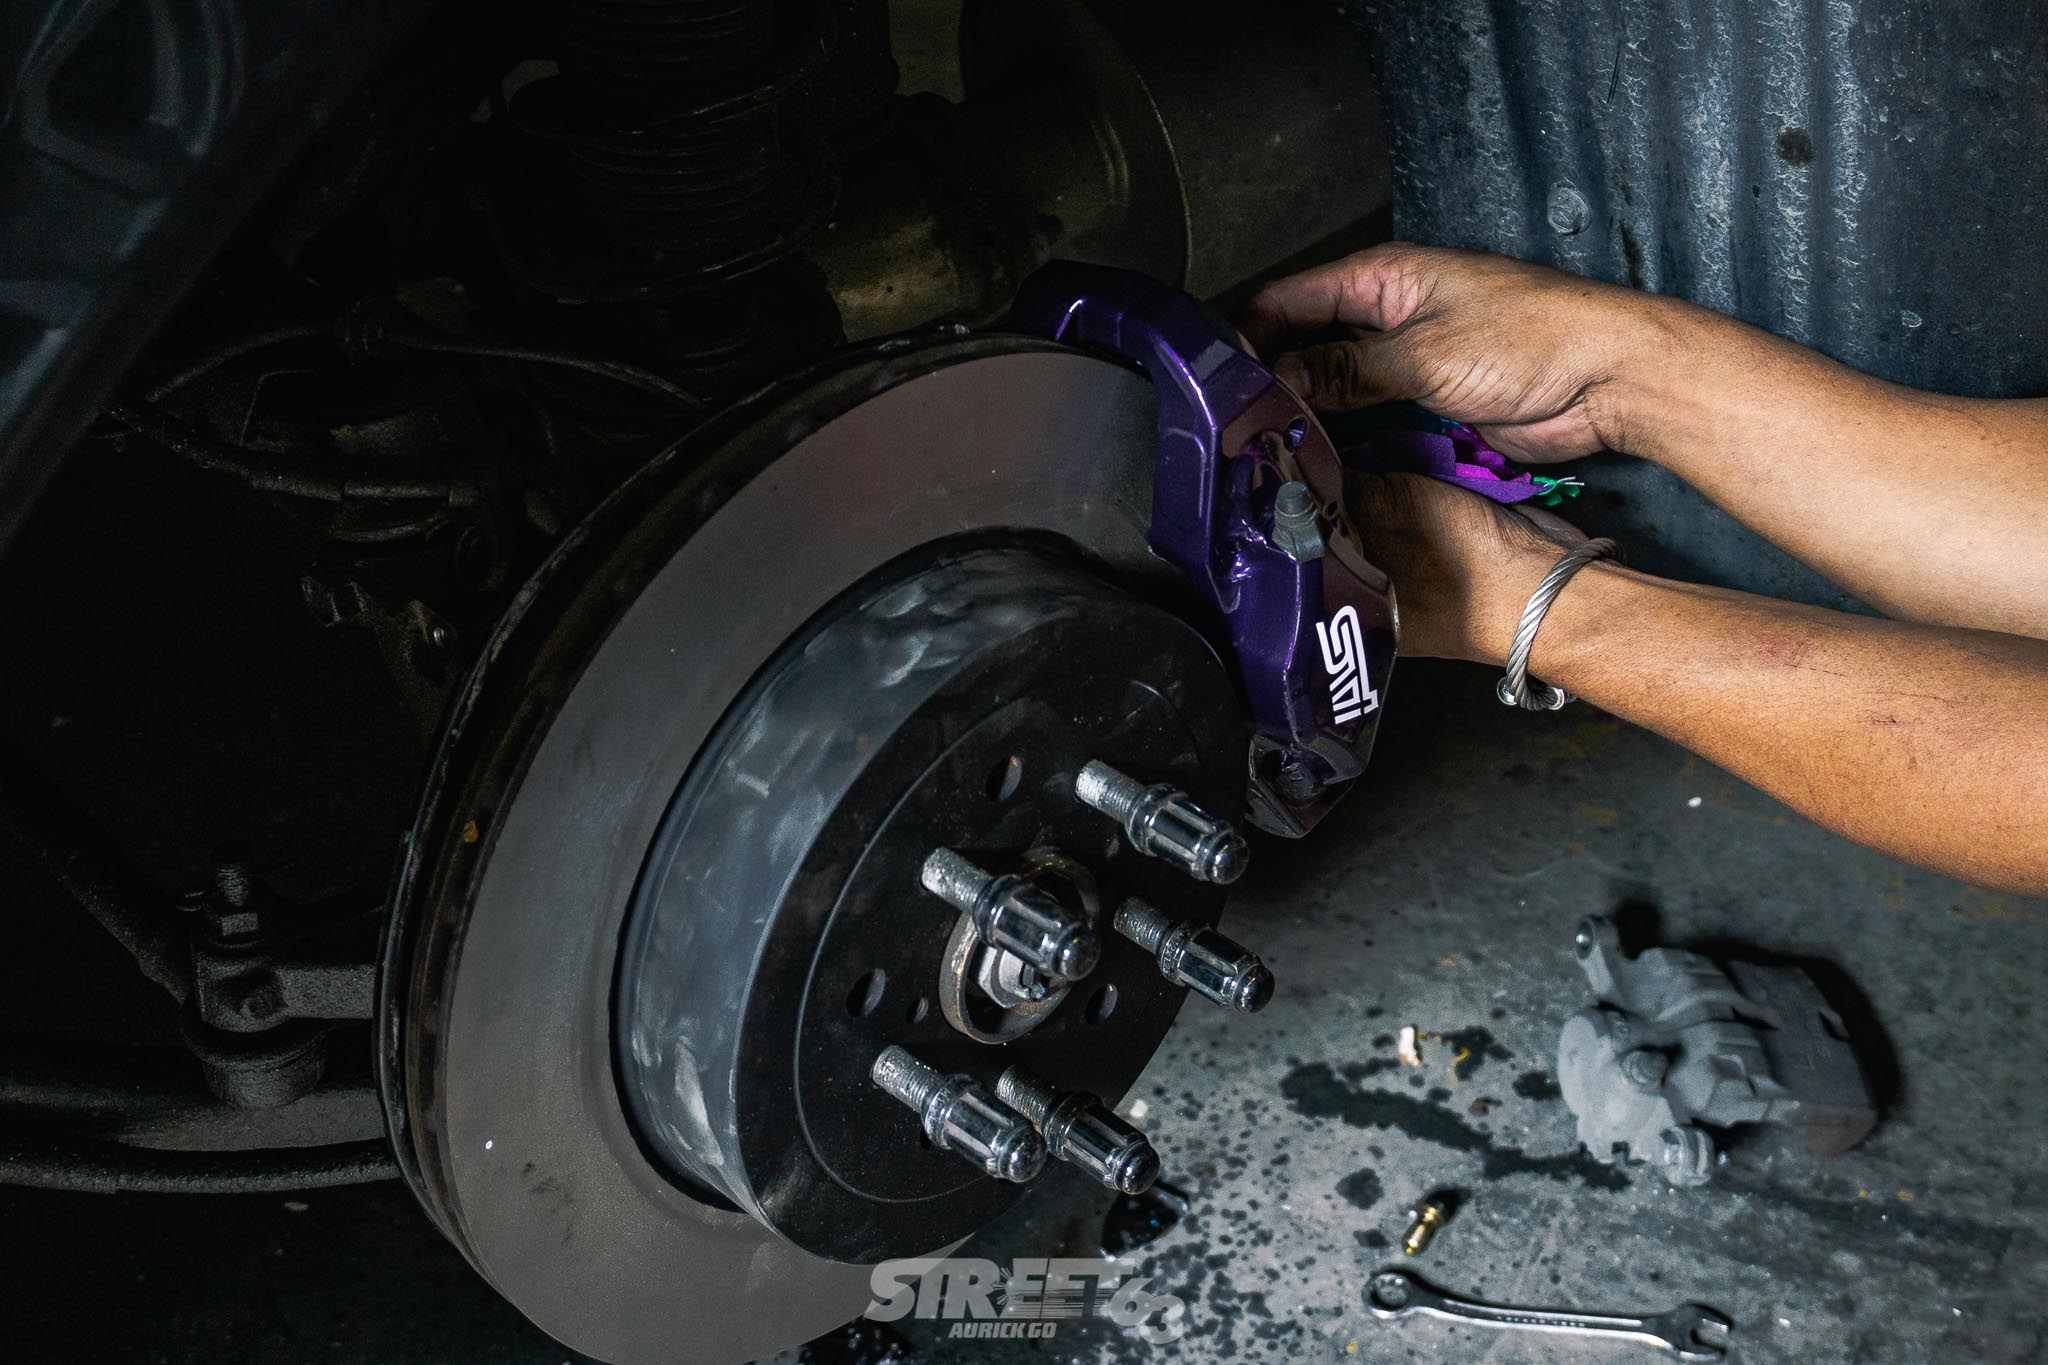
With its current setup exceeding the stock power of an equivalent WRX STI, it seems obvious that the Forester ought to upgrade to the brakes that stop a car like that: Enter the STI Brembo braking system. Scored second-hand online, this originally black STI caliper comes off the 2008+ GRB STI Hatchback and is a popular upgrade for WRXes and Foresters of that era. Its advantages are pretty clear from non-STI factory Subaru brakes – Mainly thanks to its fixed 4 piston front, 2 piston rear calipers vs the stock sliding 2-piston front/single piston rear calipers. Factory sliding calipers are cheaper to produce and often found on most economy cars, however they aren’t exactly the best at clamping pads to the rotors as well as having good pedal feel for high performance use. The Brembo STI calipers have more pistons for additional clamping force to all four rotovrs as well as providing proper confidence-inspiring feel from the brake pedal. They’re also considerably bigger than stock, bumping up rotor sizes by about 40mm from stock for more surface area on the pads and rotors. The popularity of the Brembo STI swap means it’s nothing new, but we’re here to show you how to properly assess if the used brake kit you’re looking at is worth spending for.
Inspection
Obviously, you’ll need to get a good look at what you’re buying, and with brakes there’s more weight to that than a simple visual inspection for nicks and scratches. Considering we’re looking at a set of Brembo brakes, we asked our friends at AutoPerformance Ph, the official distributors of Brembo in the Philippines, what to look out for in a properly functional caliper. “Brakes are the most important active safety feature of your car, and we will always recommend getting new discs and pads.” Says Francis Aguila, CEO of AutoPerformance Ph, “With calipers, there really is no external visual check you can do to ensure an old or surplus item is safe to use. The caliper needs to be taken apart and rebuilt properly by a trained mechanic, using components that are made specifically for that caliper. Pistons, seals, and other moving parts wear out over time, as do the caliper bores (the “cylinders” that the pistons slide into).” That said, this set of used STI calipers were disassembled, inspected, cleaned, and rebuilt with Brembo components prior to paint and refinishing – which brings us to our next step:
Cleaning
When prepping any part to install, especially when it’s used, it’s always a good idea to thoroughly clean all the components to ensure that everything works as they should. “Cleaning the brake system while it’s on the car will allow you to spot potential brake fluid leaks. These are most common around the brake hose connections, or sometimes from the brake hose itself, but can also come from the piston seals of the caliper itself. It’s the same principle as having a clean engine bay – you’ll know right away when something is leaking.”
Compatibility and Fitment
Of course, fitting a set of brakes that are not meant for your vehicle from the factory may involve a little creativity. This usually means you’ll have to fabricate a set of brackets and find appropriately sized rotors that will fit your vehicle’s hub. There’s also the temptation of taking the biggest caliper possible and shoehorning that into the hub. Going ‘big’ with big brakes however isn’t necessarily the best answer, as Francis explains: “When discussing brake specifications, most companies, like Brembo, may offer several variants for the same vehicle. A good rule of thumb is to get the least number of pistons and smallest diameter disc that will get the job done. The factors in choosing a car’s braking system are weight, top speed (not necessarily power), ride height, weight distribution, and suspension setup. The best brake upgrades are those that are designed with these specific parameters in mind, and the different variants being offered typically are designed for different setups.” In this case though, we have STI calipers that bolt right onto the Forester’s hubs like Lego, and the stainless steel braided lines that worked for the stock calipers line right up as well. Gotta love the parts bin quirks of Subaru.
Pad and Rotor selection
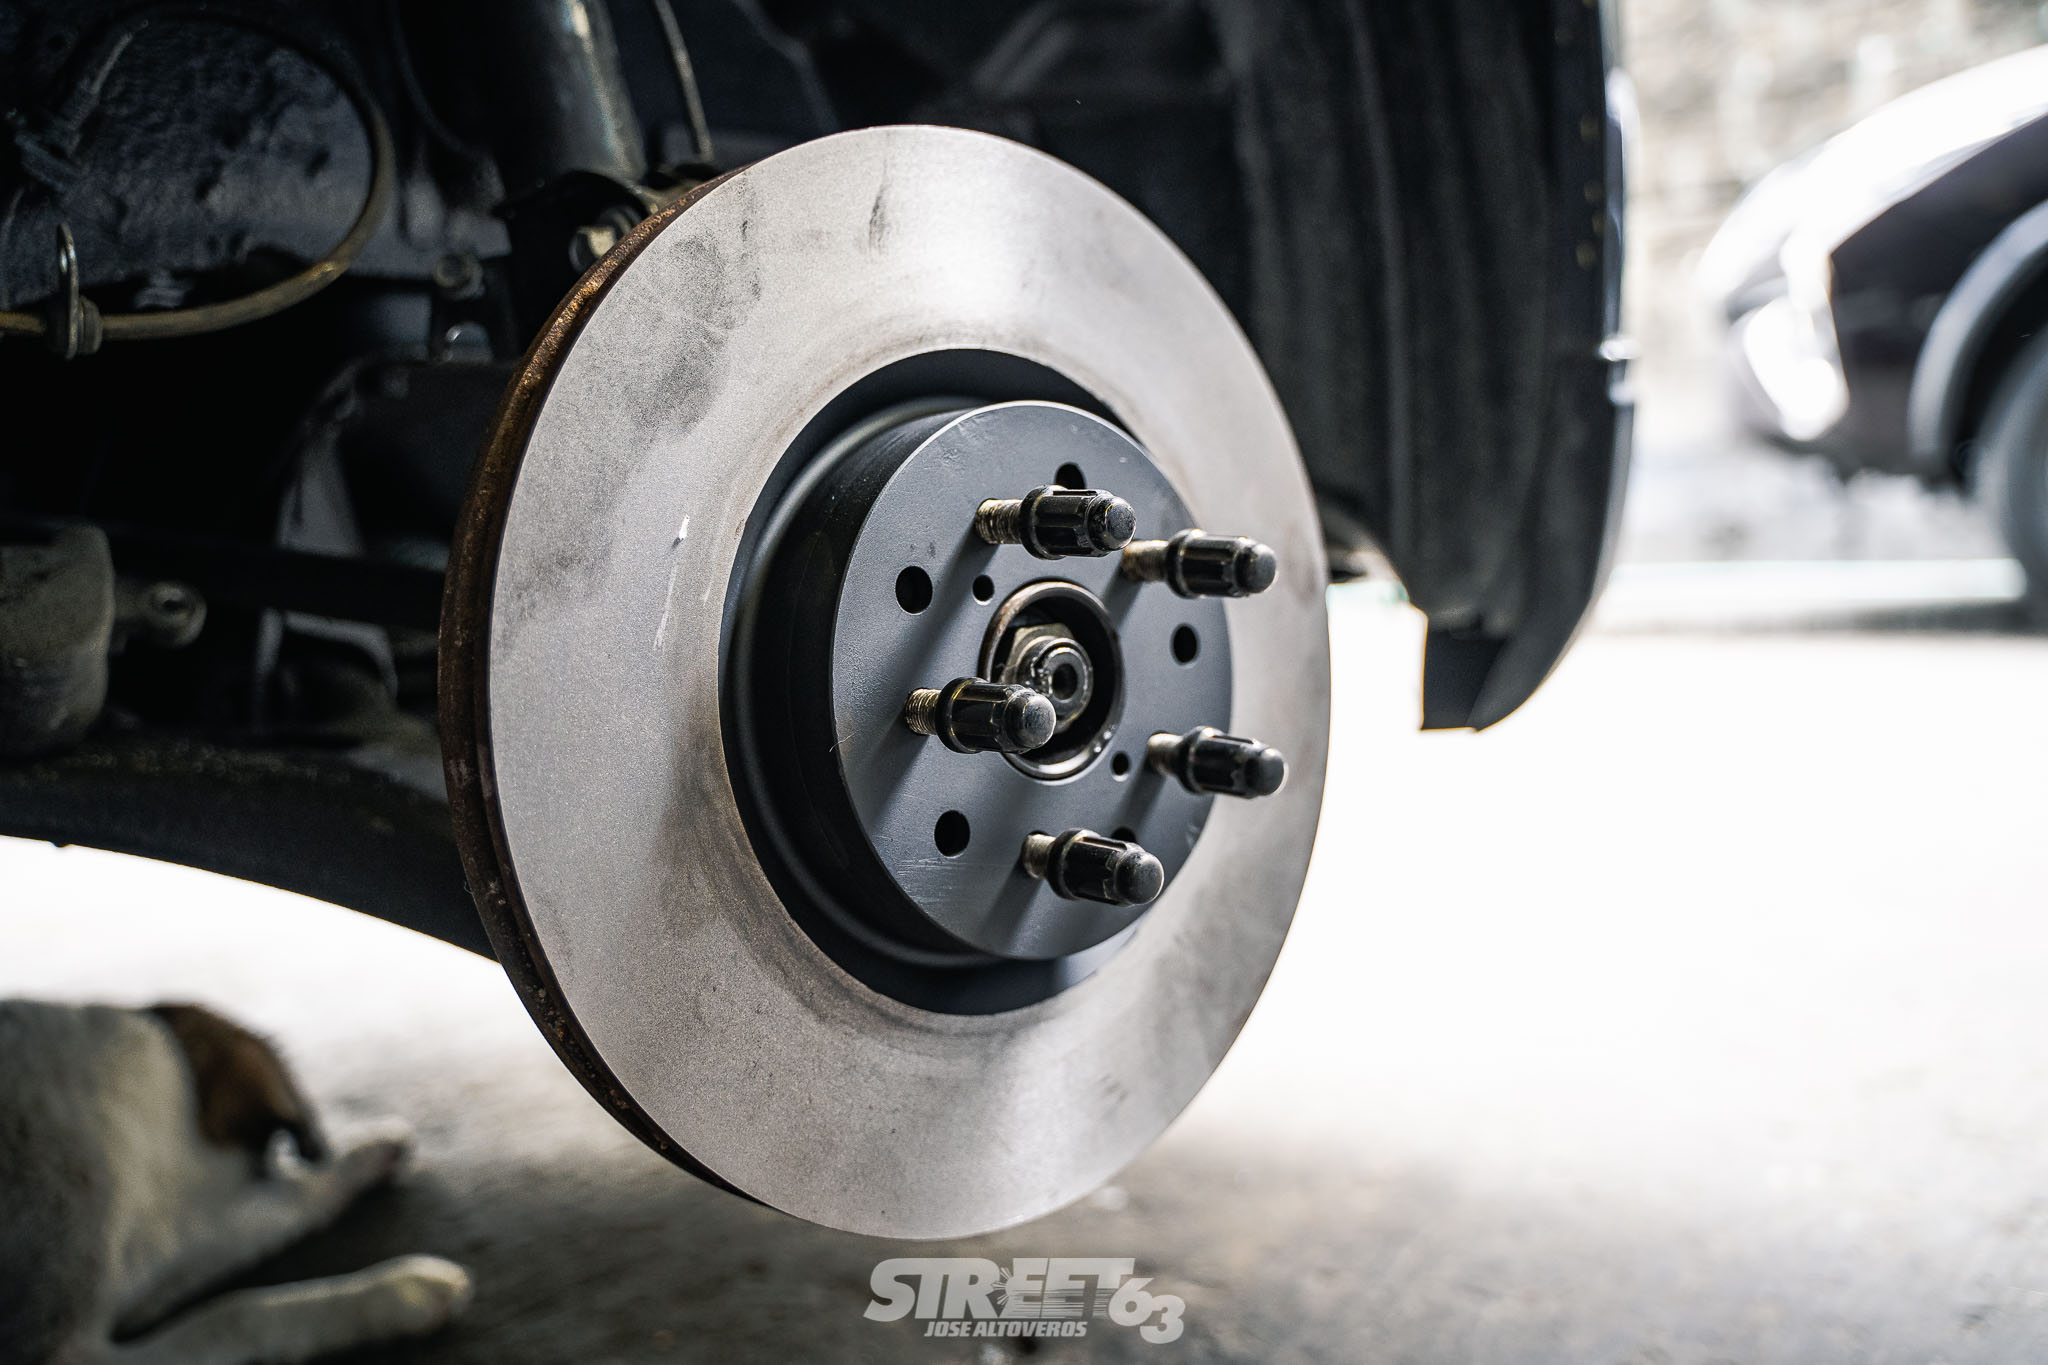
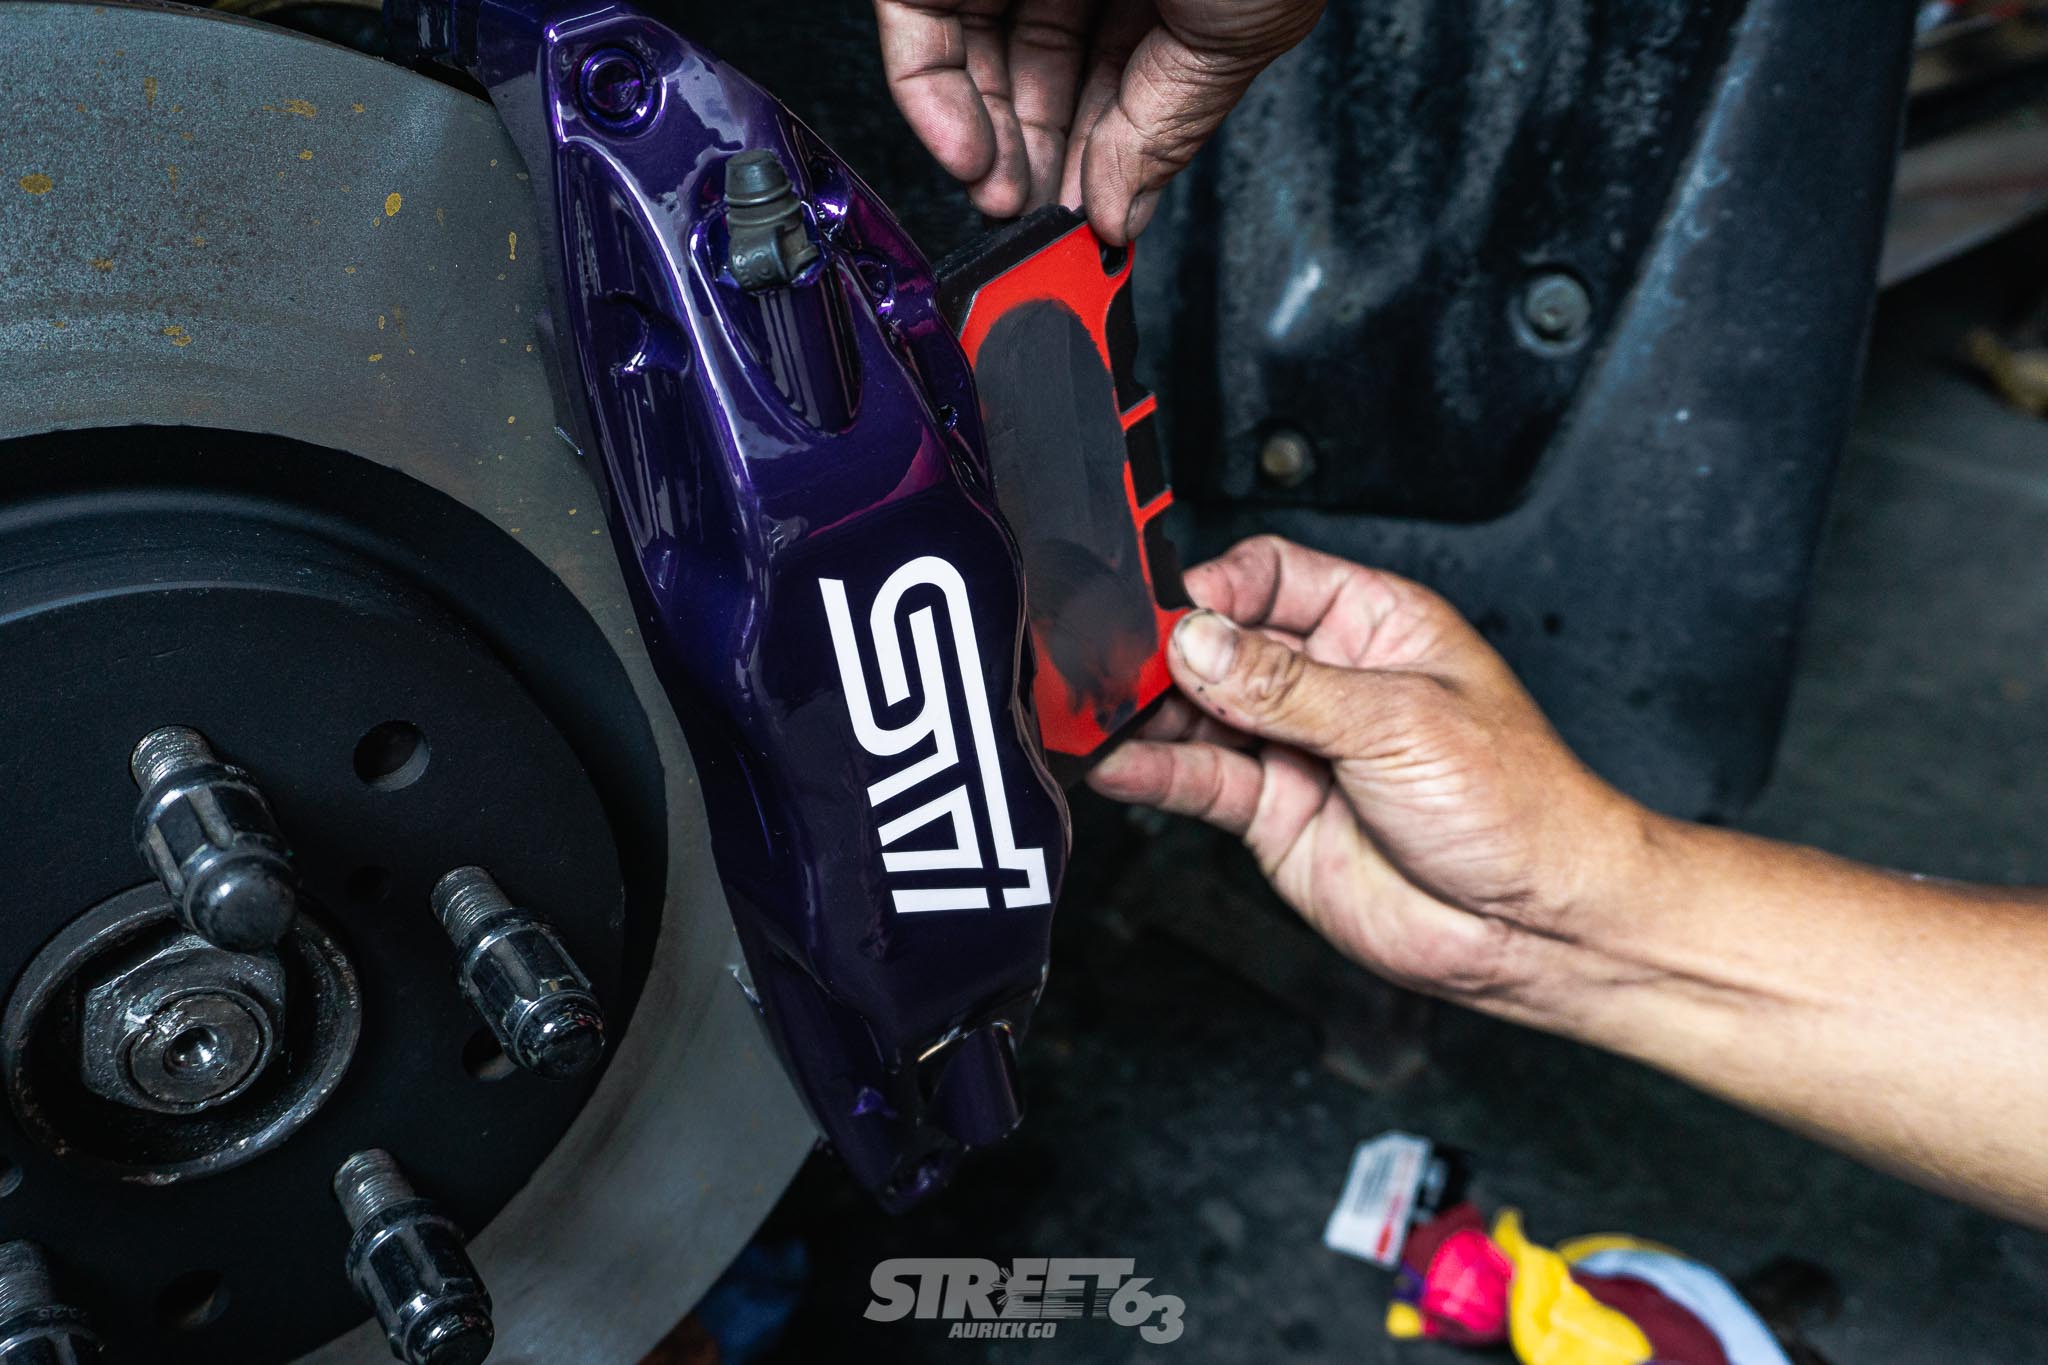
The very things that determine your braking are the parts that make friction to bring your car to a halt. Pads and rotors then are obviously key components of the system that should be studied and selected carefully to ensure proper operation. “When installing new brake pads, it’s recommended – but not required – that you replace the brake discs, too.” Francis tells us. “This is so that when you bed the brakes in, the pad surface has a consistent surface to deposit friction material onto. If you aren’t going to replace the discs, then you absolutely should resurface the rotors using a disc brake lathe. Just be sure that there is enough useable thickness on the rotor left when you resurface. The disc minimum thickness should be checked with a micrometer, and the minimum thickness is usually engraved onto the disc edge.” Considering that our STI caliper is made by Brembo, it only made sense that we install a set of Brembo Ceramic Brake Pads to get as close to factory specification as possible. The rotors that came with the calipers were then resurfaced to match the new pads.
Bleeding and picking the right Brake Fluid
The entire braking system relies on hydraulic fluid to translate your foot’s input towards clamping the calipers onto the pads and rotors. And if you know anything about hydraulic systems, you would know that any air in the system reduces the effect of whatever needs pressing. For brakes then, it is highly pertinent that we select the correct fluid and properly bleed the whole system of any air bubbles. “Most people bleed the brakes by loosening the bleeder screw and pumping the brake pedal until all the pedal become firm. This method, however, isn’t 100% effective, and if done wrong can actually introduce more air in the system, which is exactly what we are trying to avoid. Using a proper bleeder tool is a lot quicker and more efficient. Regardless of the method you use, you should absolutely clean the area directly around the bleeder screw, fluid reservoir cap, and the general surrounding area. This is so that you don’t inadvertently get dirt, debris, or other contaminants in your brake fluid.”
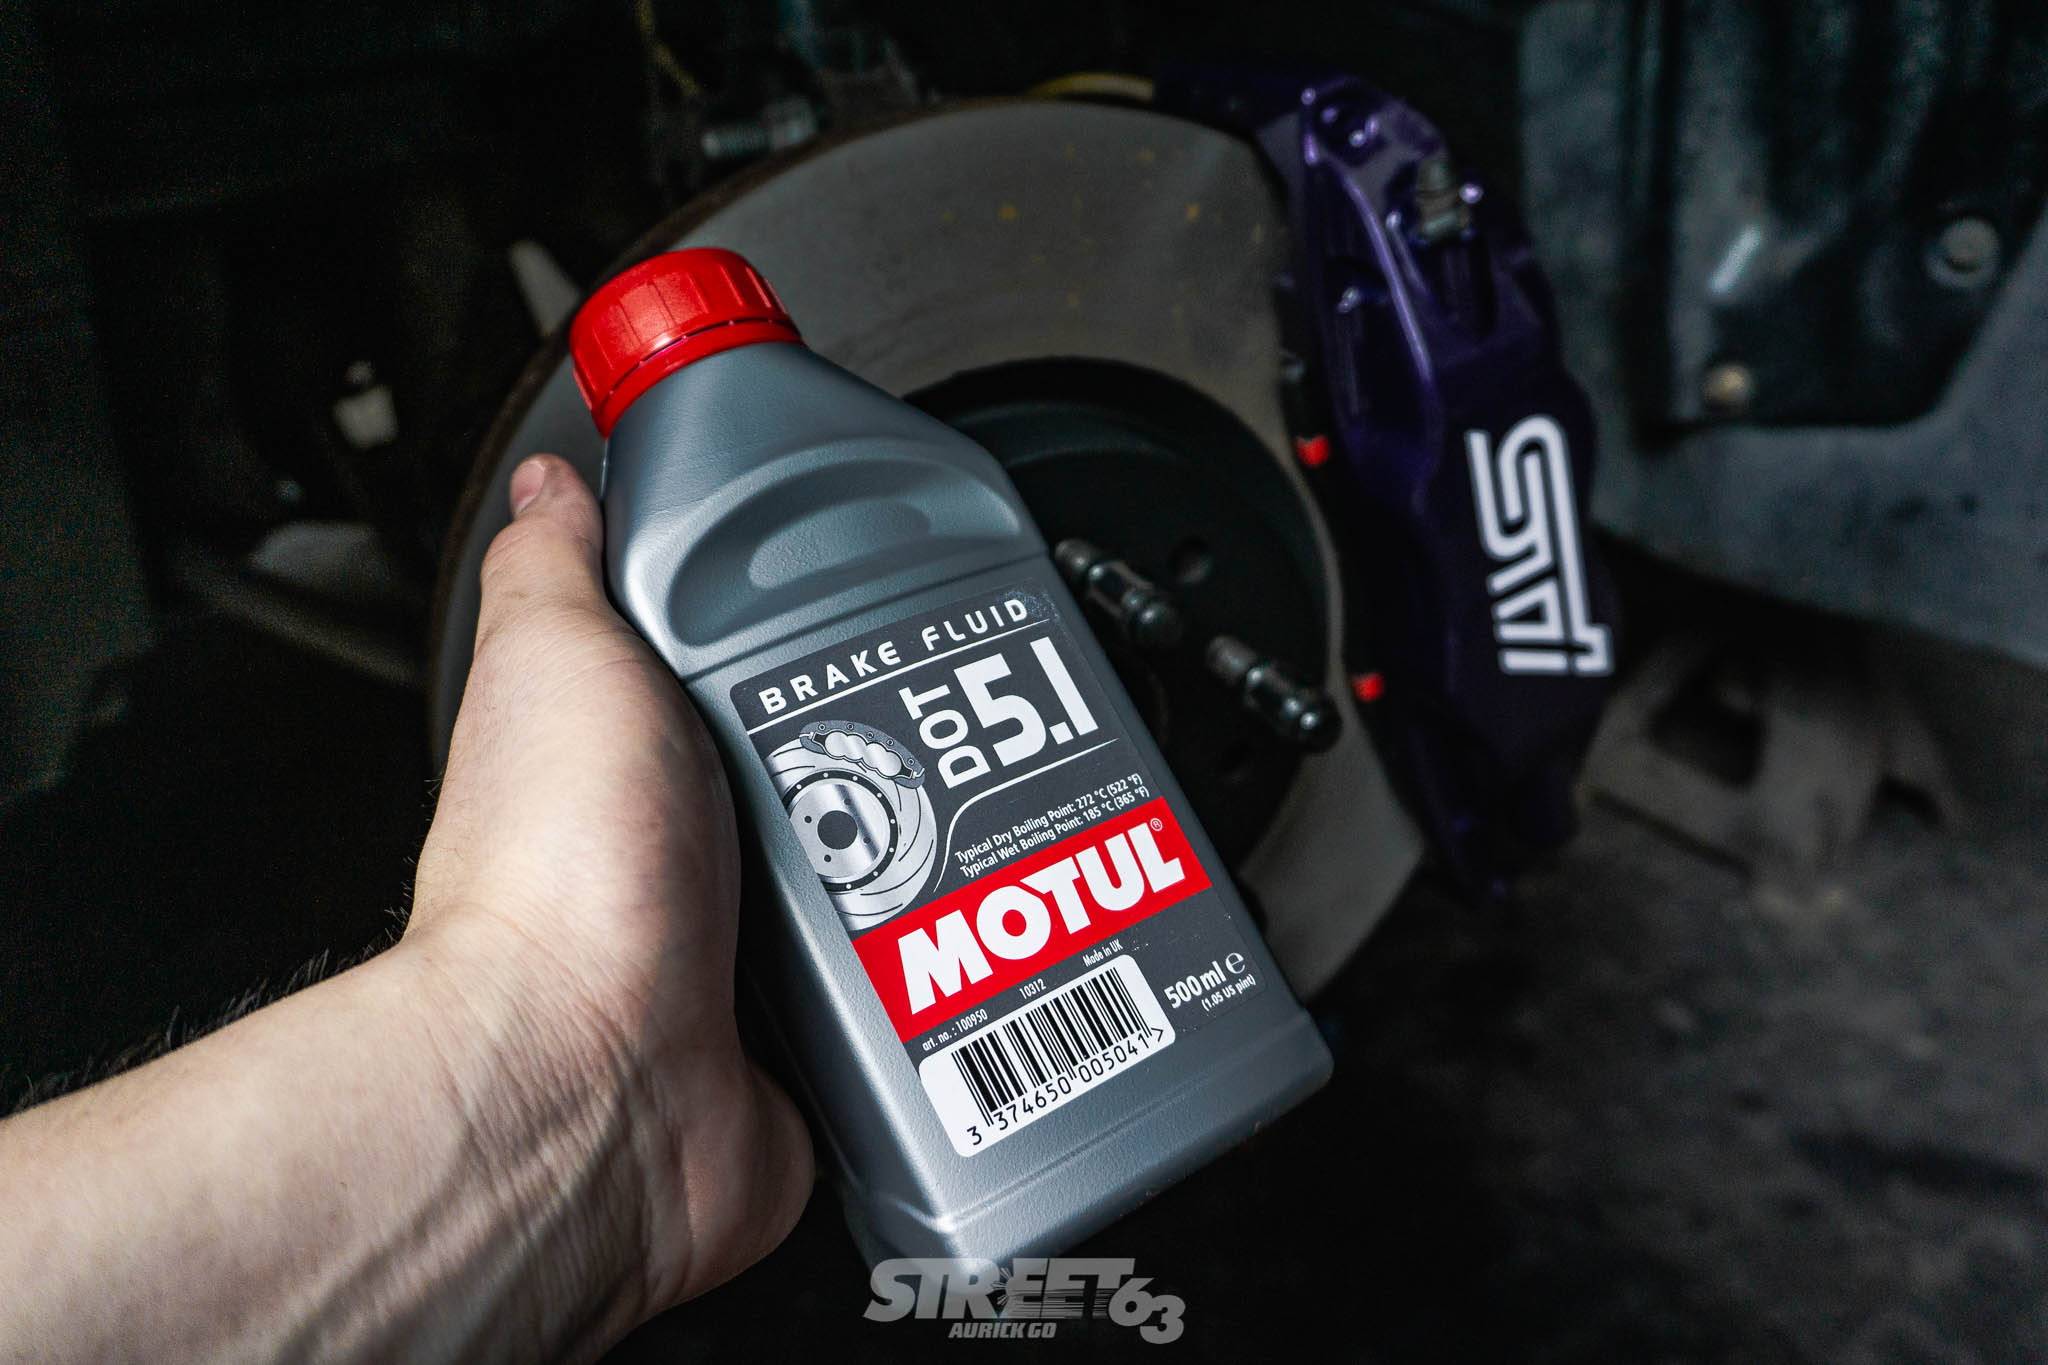
Proper selection of brake fluid is just as crucial as bleeding the air out of your system. With various brands carrying DOT 3, 4, or 5, it’s easy to fall for the ‘the higher the number, the better’ spiel; This of course, is not the case as our friend from AutoPerformance Ph continues: “The main difference between DOT 3, DOT 4 and DOT 5.1 is their wet and dry boiling points – essentially how hot they can run before the fluid boils up to a gaseous state. When that happens, you will lose braking force, because vapor is compressible, and instead of translating the force of your foot on the pedal directly to the caliper, it is used to compress the vapor trapped in the hydraulic system. For most people DOT 3 fluid is enough. For higher performance vehicles or tuner cars, or if you frequently drive through mountainous areas, DOT 4 is recommended. And if you typically track your car, there are DOT 5.1 fluids that have operating temperatures that are still streetable. Racing fluid should never be used on a road car, even if you track it frequently. Much like race pads, race fluid requires getting up to operating temperature before it works properly, and there’s almost no way to get them up to temp when you just start your car.” Having considered the additional heat generated by the Forester’s additional weight vs a standard WRX STI along with all the equipment at hand, we opted to use Motul DOT 5.1 for a bit more peace of mind when leaning on the brakes repeatedly.

Post-Install checks and bedding procedure
Once the brakes have been fitted your mechanic may tell you that the system will require ‘bedding-in’ before you can use it to its full potential. To explain how this is performed, we first have to define how your brake system stops the car: “Brakes work by converting kinetic energy – ie. Movement of the car – into heat energy through friction. This process is what stops the car. Bedding in the brakes is the process of applying an even layer of friction material onto the surface of the brake disc. This process maximizes the amount of friction that can be generated when the brake disc and brake pad are pressed together. That means greater braking efficiency.” In other words, to get the most out of your pads and rotors the car needs to be driven and stopped within a certain speed range for a certain period before the system will be ready for full, high performance use. Failure to do this may cause unwanted effects, as Francis continues, “If the bed-in procedure is not followed properly, you can inadvertently leave an uneven layer of pad material, which creates high and low areas. When the pad is pressed onto the disc, it can create vibrations or noise, and this vibration (also known as judder) is not just uncomfortable, it decreases the overall effectiveness of the brakes.”
“For almost all road cars, the recommended bed in procedure is simple – run the car normally, avoiding high speed braking or heavy braking for the first 100km. This is usually enough to give you a nice even layer on the disc. For race cars and ultra high performance brakes, there is a more specific bed-in process, which is only done on a track.”
Care, maintenance, and wear
With regular use, your brake system goes through a bunch of consumable parts in the long run. Brake pads usually go first, and after a few sets of pads your rotors would have been ground down to nothing as well; Not to mention regular brake fluid changes at certain intervals. All this means is there are plenty of things to keep an eye out for with the brakes, and all it takes is a few moments of checking to catch a fault if there is any. “The replacement rates of brake discs and brake pads vary greatly, even with cars of the same model. Driving habits, typical load, road conditions, and traffic conditions all play a role in how long brake components last. Brake pads (unlike brake discs) also have wear indicators – either an audible indicator, which makes an annoying high-pitched screech, or an electronic one, which will show a warning light on your dashboard or instrument cluster. But a good rule of thumb is this – every time you change your engine oil, have your brake pads checked. Every time you replace your pads, have your brake discs and brake fluid checked. Whenever you replace your brake fluid, have it flushed first, and have your brake lines and brake cylinders checked. And with your brake fluid, a ‘top up’ actually does nothing – you are literally throwing money away. The effectiveness of the fluid already in the system is already reduced, and adding new fluid doesn’t help. Think of it like having a glass of dirty water – adding some clean water doesn’t make it any better to drink. Flush the old fluid out with cheap brake fluid and then use good quality fluid for the fill up. Don’t forget to bleed the system. Calipers have a really long lifespan, but it doesn’t hurt to have it checked at 100,000km.”

With this upgrade properly fitted onto the FXT my friend, the owner, immediately felt the improvement over his stock setup. “Unlike the stock OEM Forester brakes, these match stopping power with the pressure you put on the pedal. It feels solid, and easily makes me feel safe with the confidence brought about by the stronger stopping power from the Brembo calipers and pads. There is great peace of mind to be found in knowing that your brakes can stop your car whenever you need it to, and these STI brakes feel like proper anchors while the stock setup felt like hooks.”

Endeavoring to upgrade your brakes definitely takes a lot of studying and proper homework, but following these steps ought to point us towards the right direction. That besides, you of course need to have the right people and original equipment to work with.
We would like to extend our thanks to Francis Aguila and AutoPerformance Ph. for helping with the technical side of this piece. Should you wish to know more about Brembo and their other products, head on over to AutoPerformance Ph’s home page to find out what brakes could fit your application.
Words by Aurick Go
Photos by Jose Altoveros, Aurick Go
2010 Subaru Forester XT (SH9)
Engine and Driveline
EJ255 Stock Internals
ECUTEK Racerom tune
AEM Fuel Pump
Grimmspeed Electronic Boost Control Solenoid
IHI VF52 Turbo
Process West Verticooler
Subaru Power Steering Cooler
Perrin Oil Cooler
ATF Cooler
Invidia 3” Divorced Downpipe
ProFab 3” Catback Exhaust
Wheels, Brakes, and Suspension
KYB GH8 WRX Struts (KYB Shocks and stock Springs)
Whiteline rear Lower Control Arms
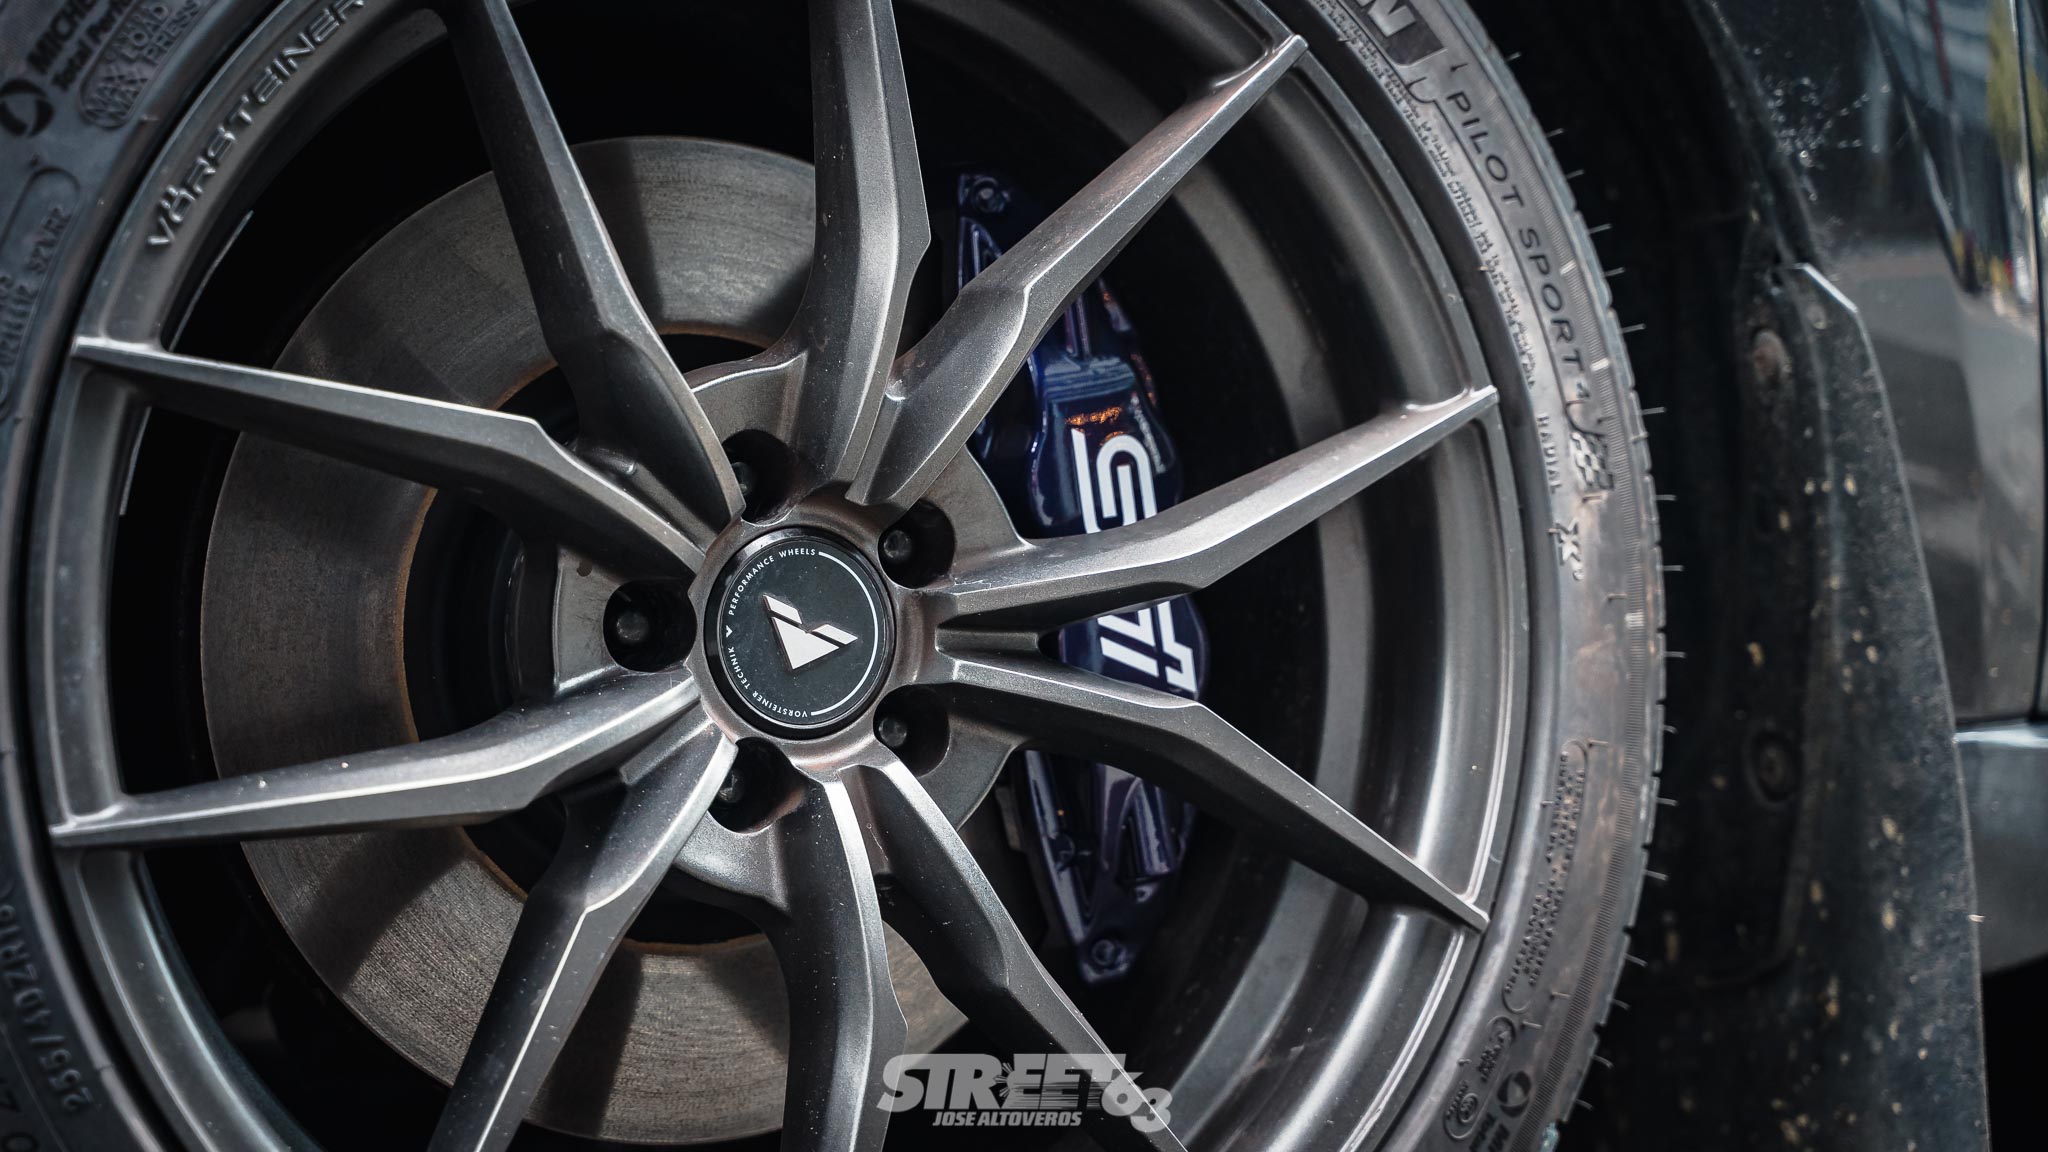
Vorsteiner VFF-109 18 x 9.5
Michelin Pilot Sport 4 245/45/18
GRB WRX STI Brembo brake kit
Brembo Ceramic Pads
Goodridge Stainless Steel Brake Lines
Exterior
Forester tS Wraparound kit (Front Lip, Rear Diffuser)
Rear Gate Spoiler
Subaru Sports Grill
Interior
Defi-link Gauges (Boost, Water Temp, Oil Temp)
Android Head Unit